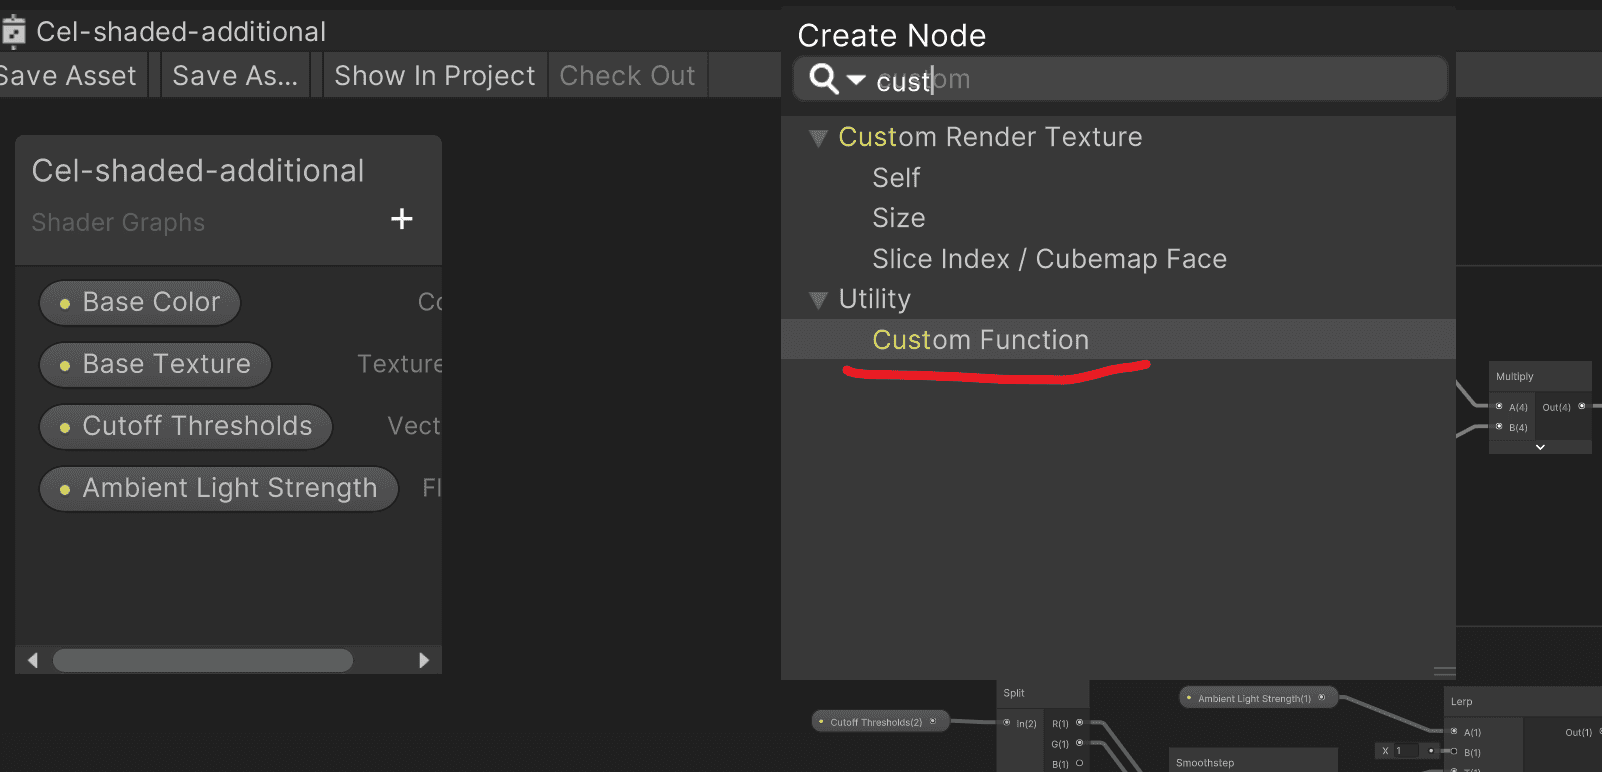
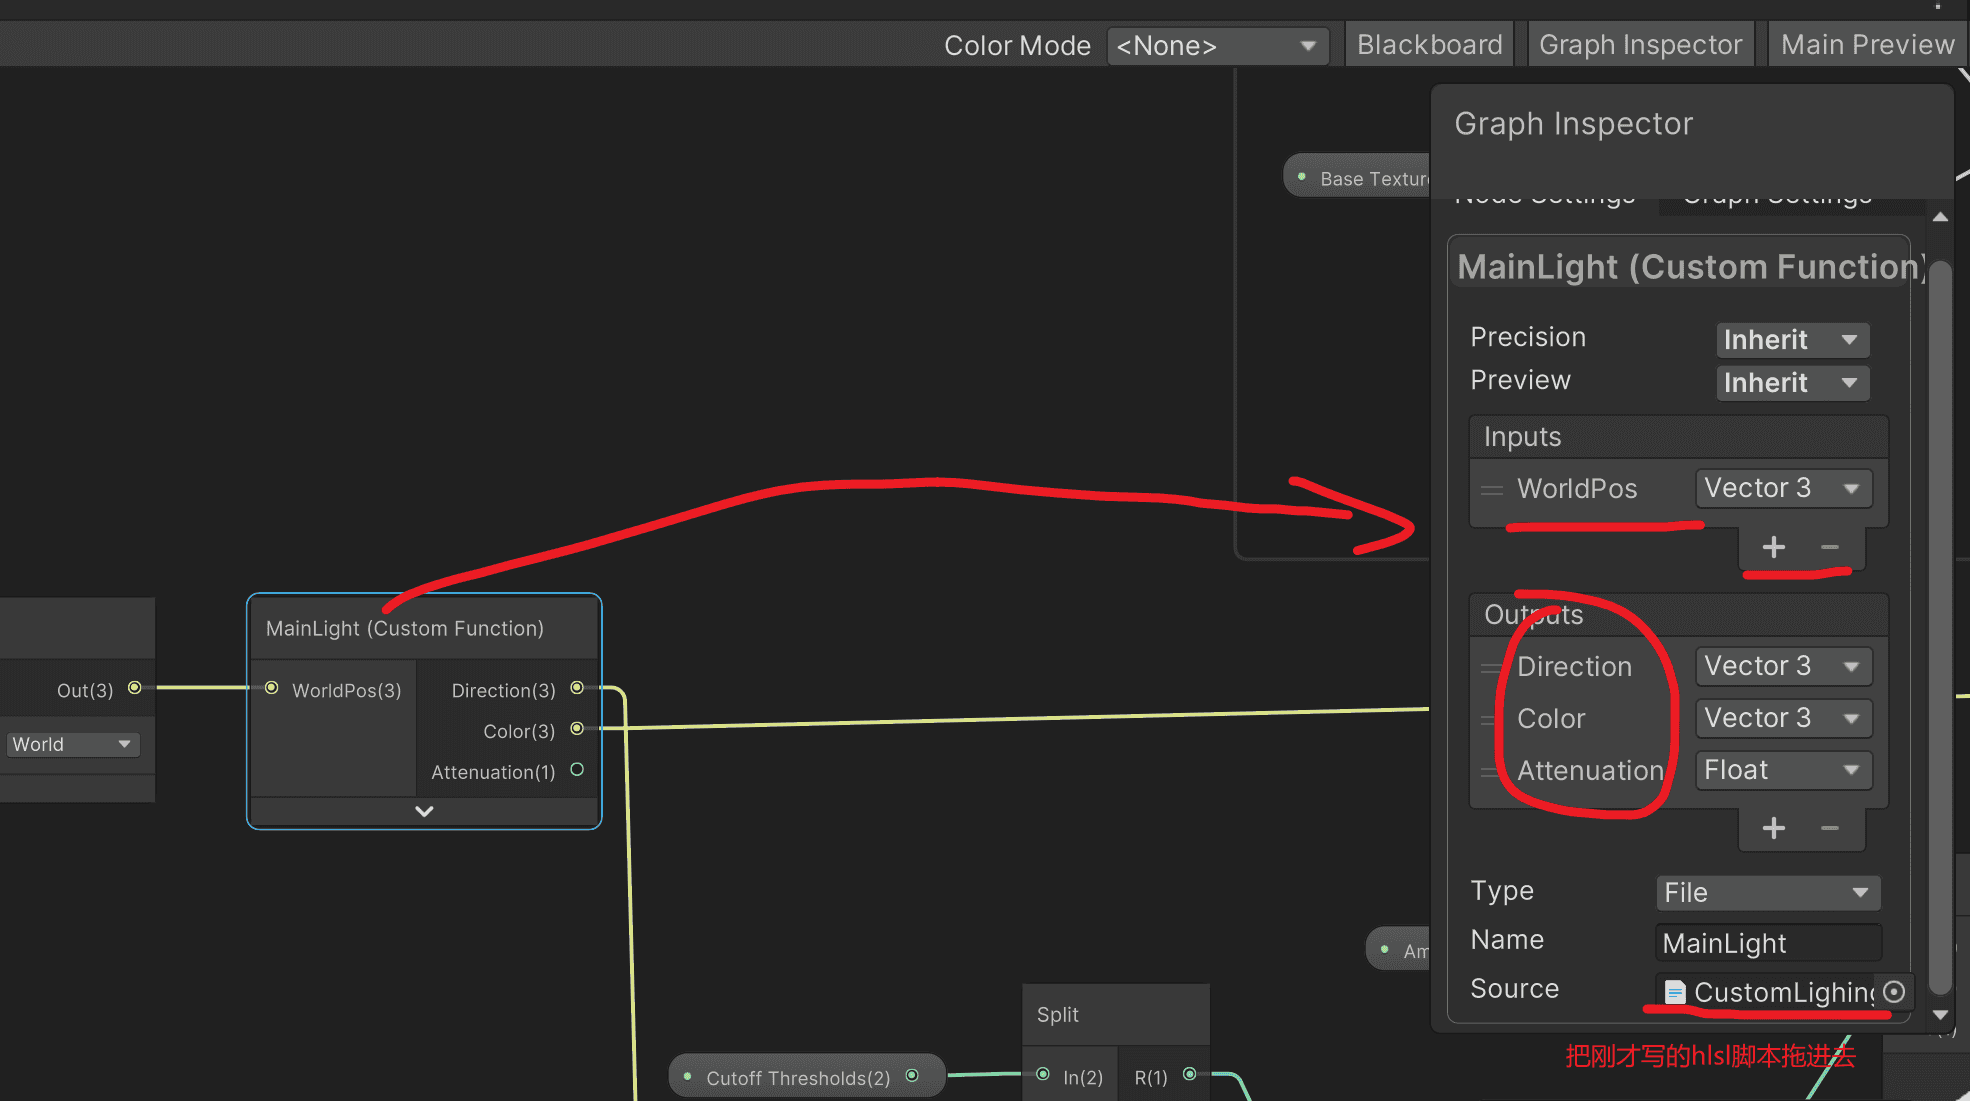
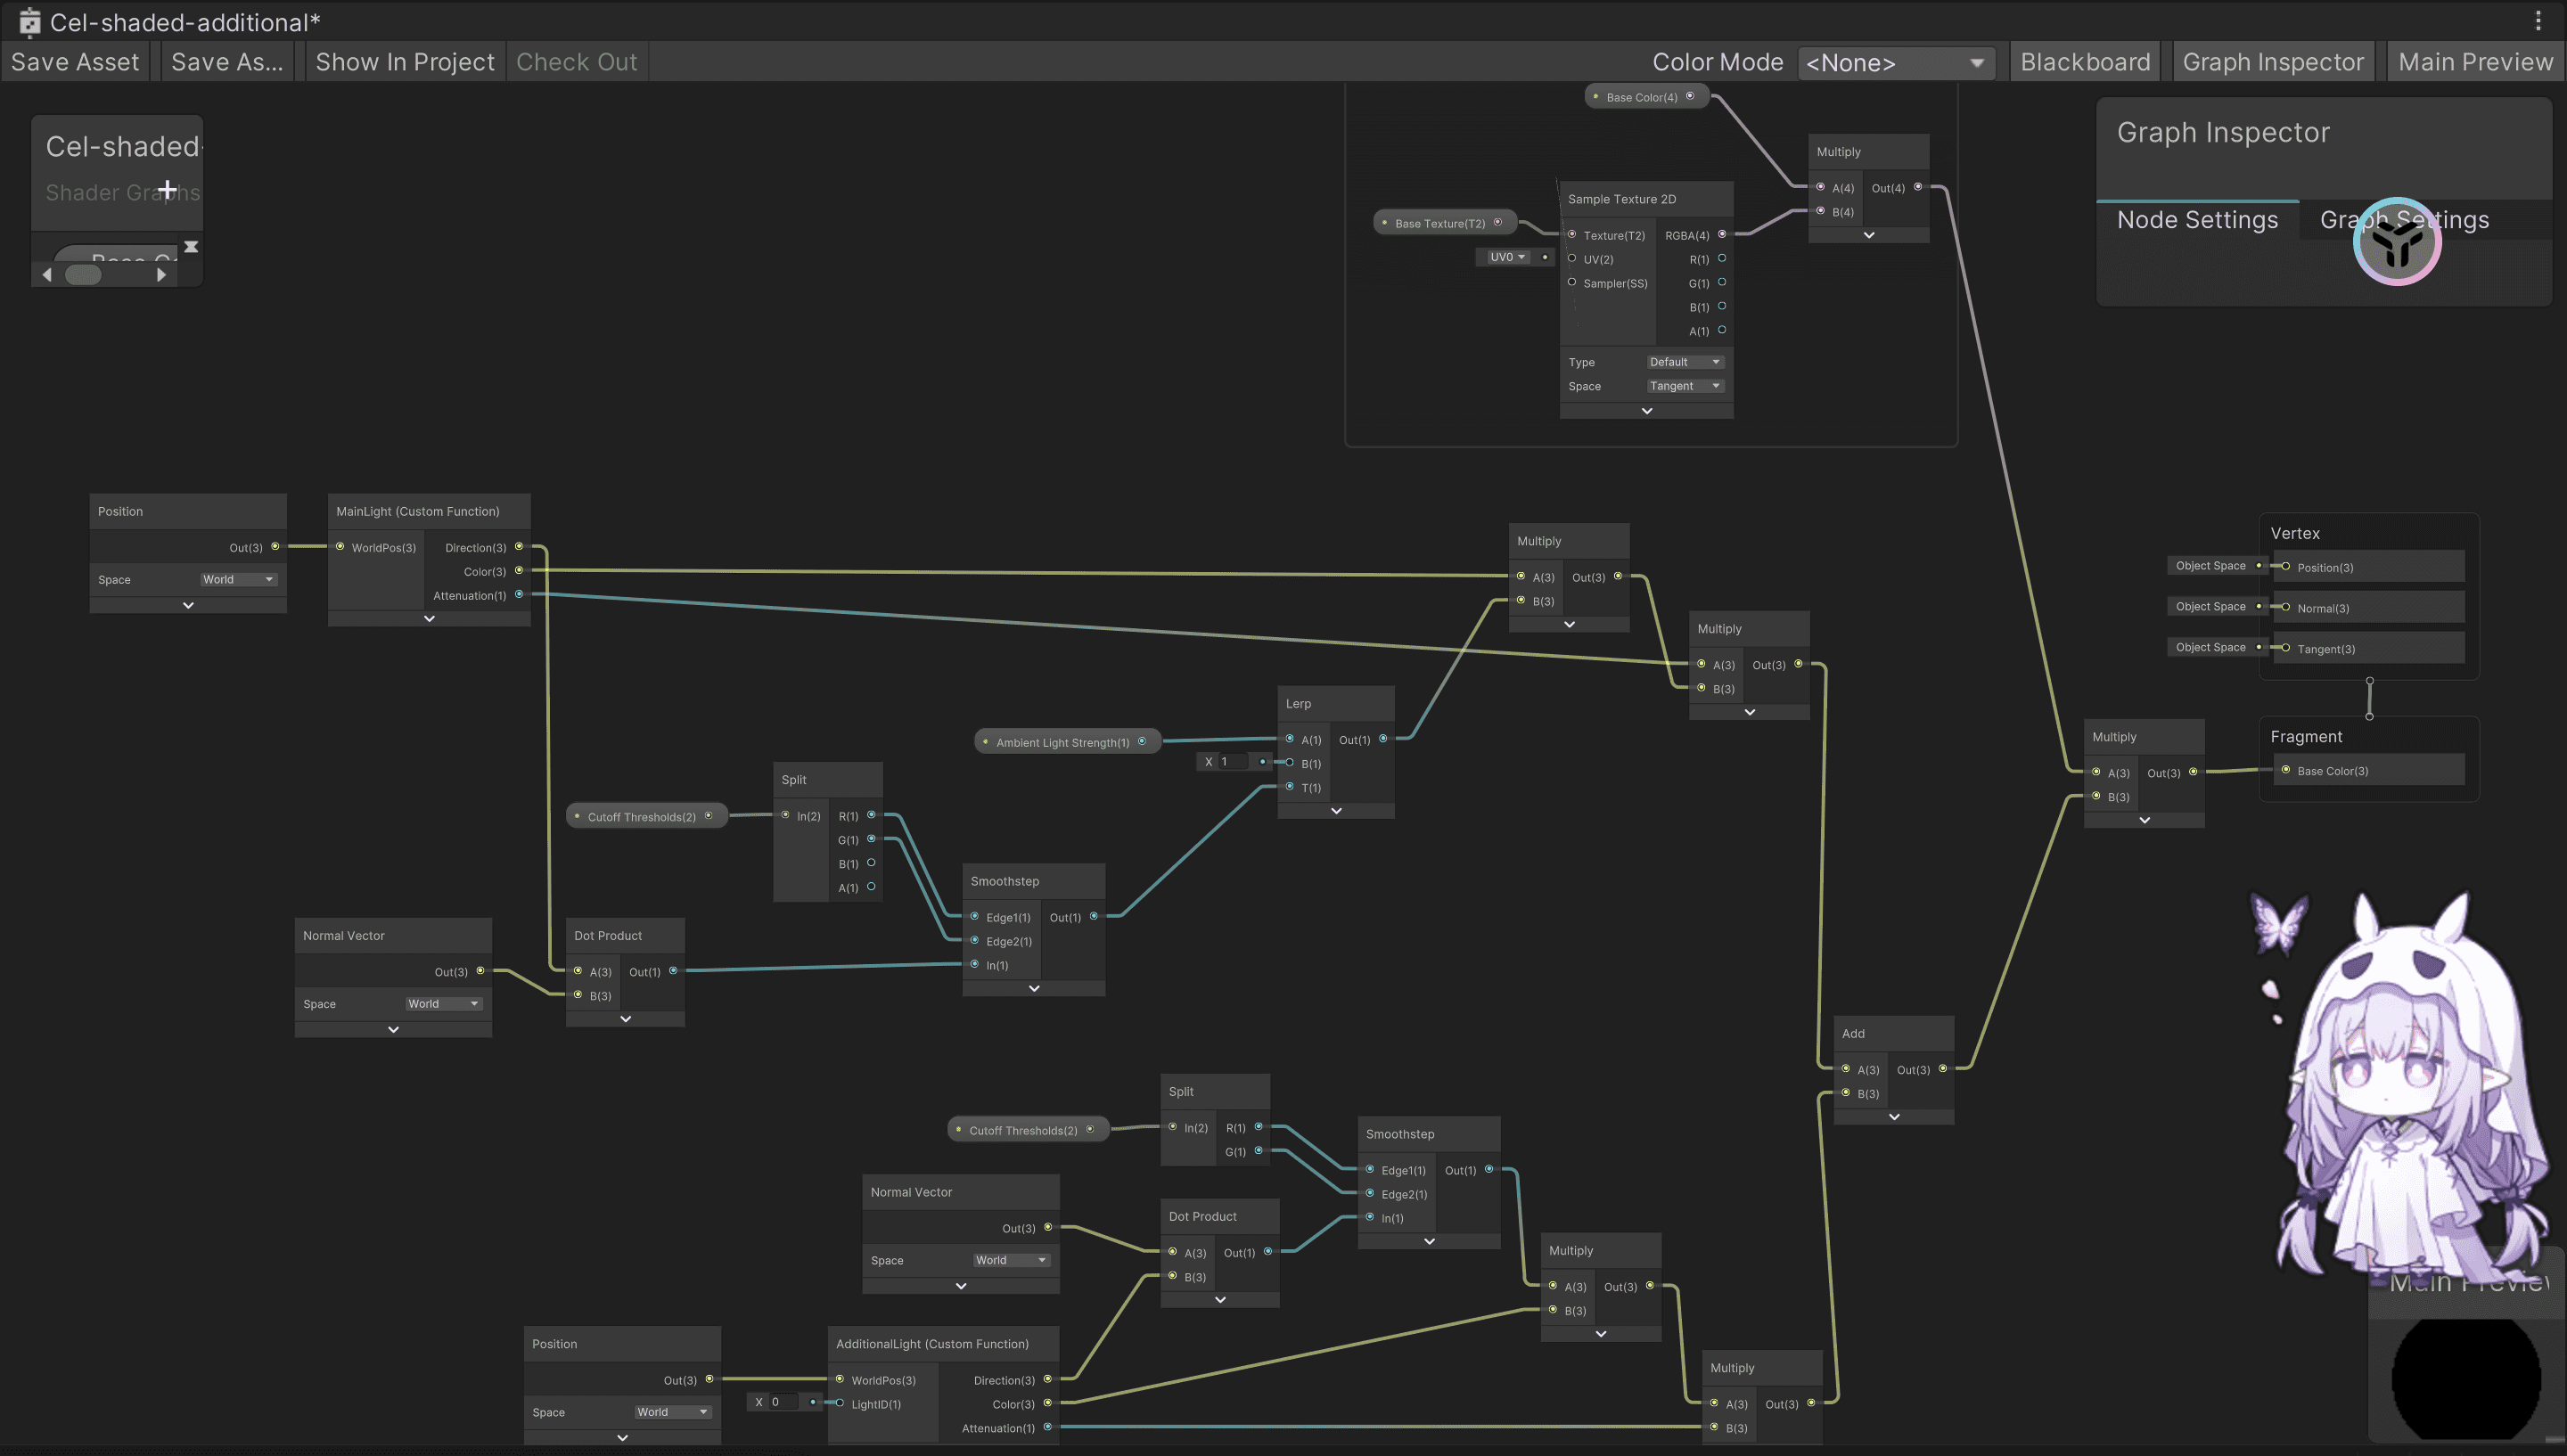
void MainLight_float(float3 WorldPos, out float3 Direction, out float3 Color, out float Attenuation) { #ifdef SHADERGRAPH_PREVIEW Direction = normalize(float3(1.0f, 1.0f, 0.0f)); Color = 1.0f; Attenuation = 1.0f; #else Light mainLight = GetMainLight(); Direction = mainLight.direction; Color = mainLight.color; Attenuation = mainLight.distanceAttenuation; #endif }
void MainLight_half(half3 WorldPos, out half3 Direction, out half3 Color, out half Attenuation) { #ifdef SHADERGRAPH_PREVIEW Direction = normalize(half3(1.0f, 1.0f, 0.0f)); Color = 1.0f; Attenuation = 1.0f; #else Light mainLight = GetMainLight(); Direction = mainLight.direction; Color = mainLight.color; Attenuation = mainLight.distanceAttenuation; #endif }
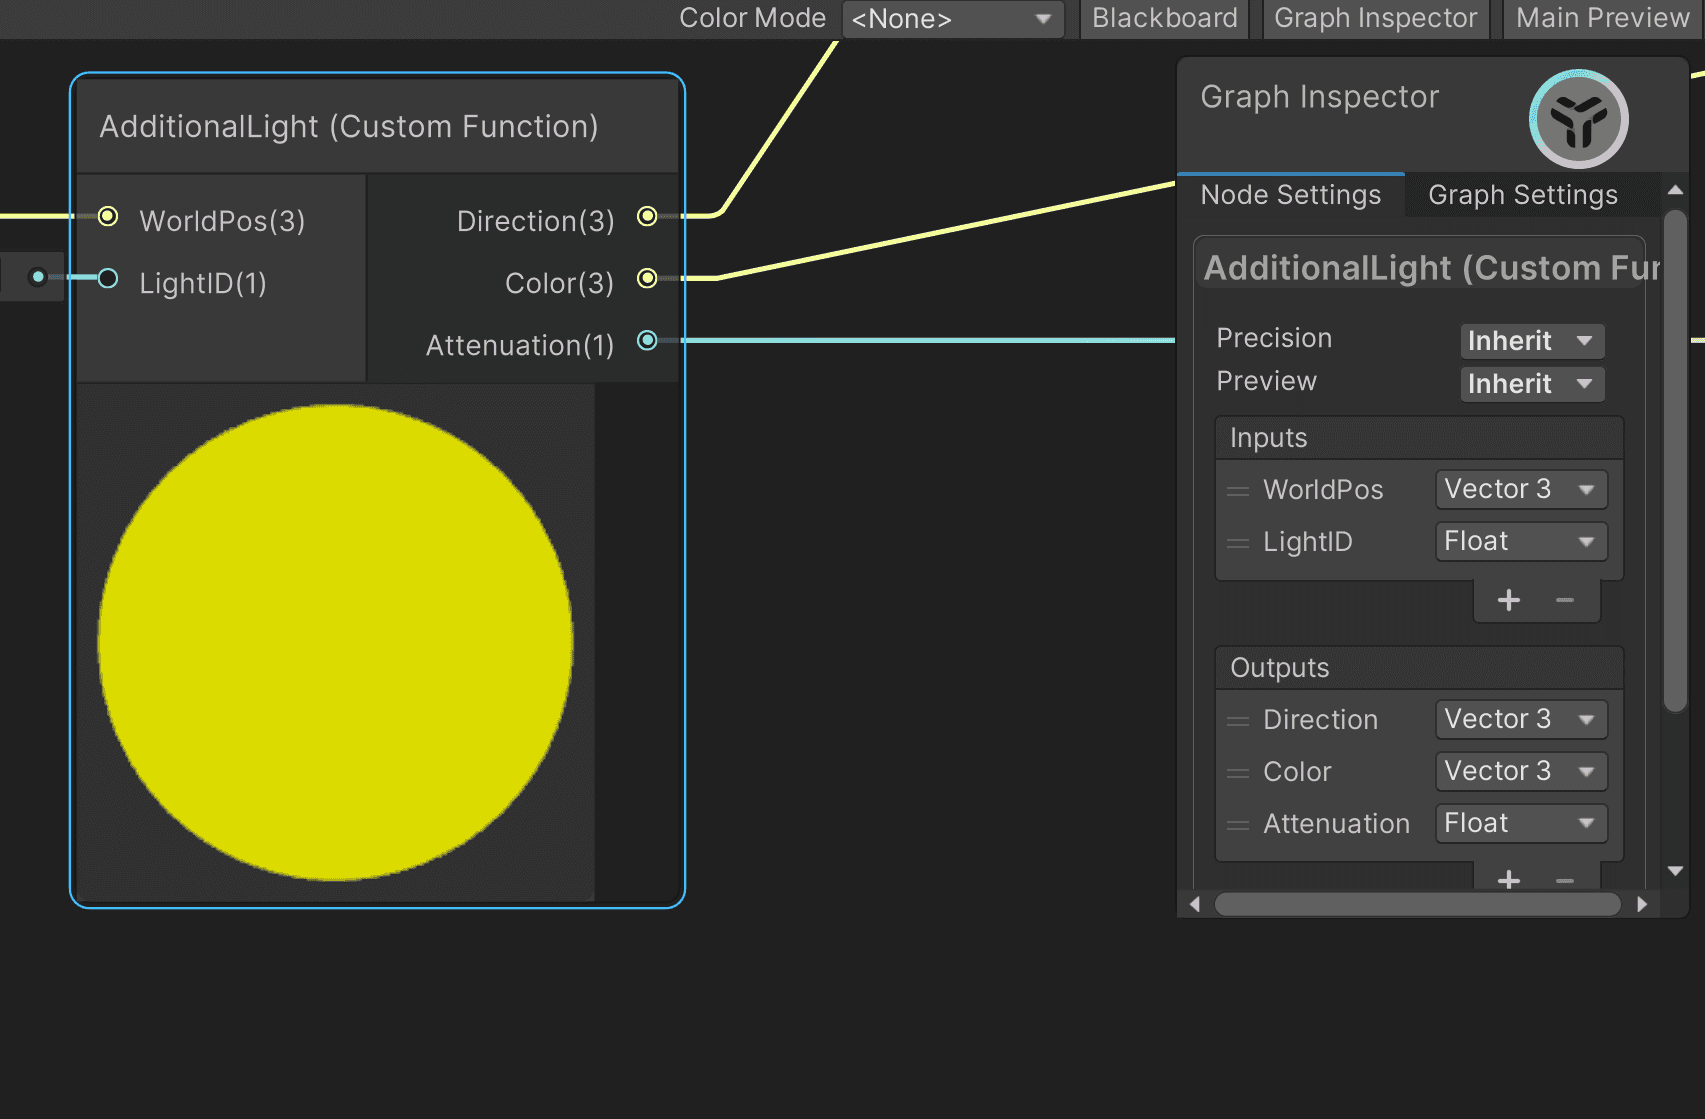
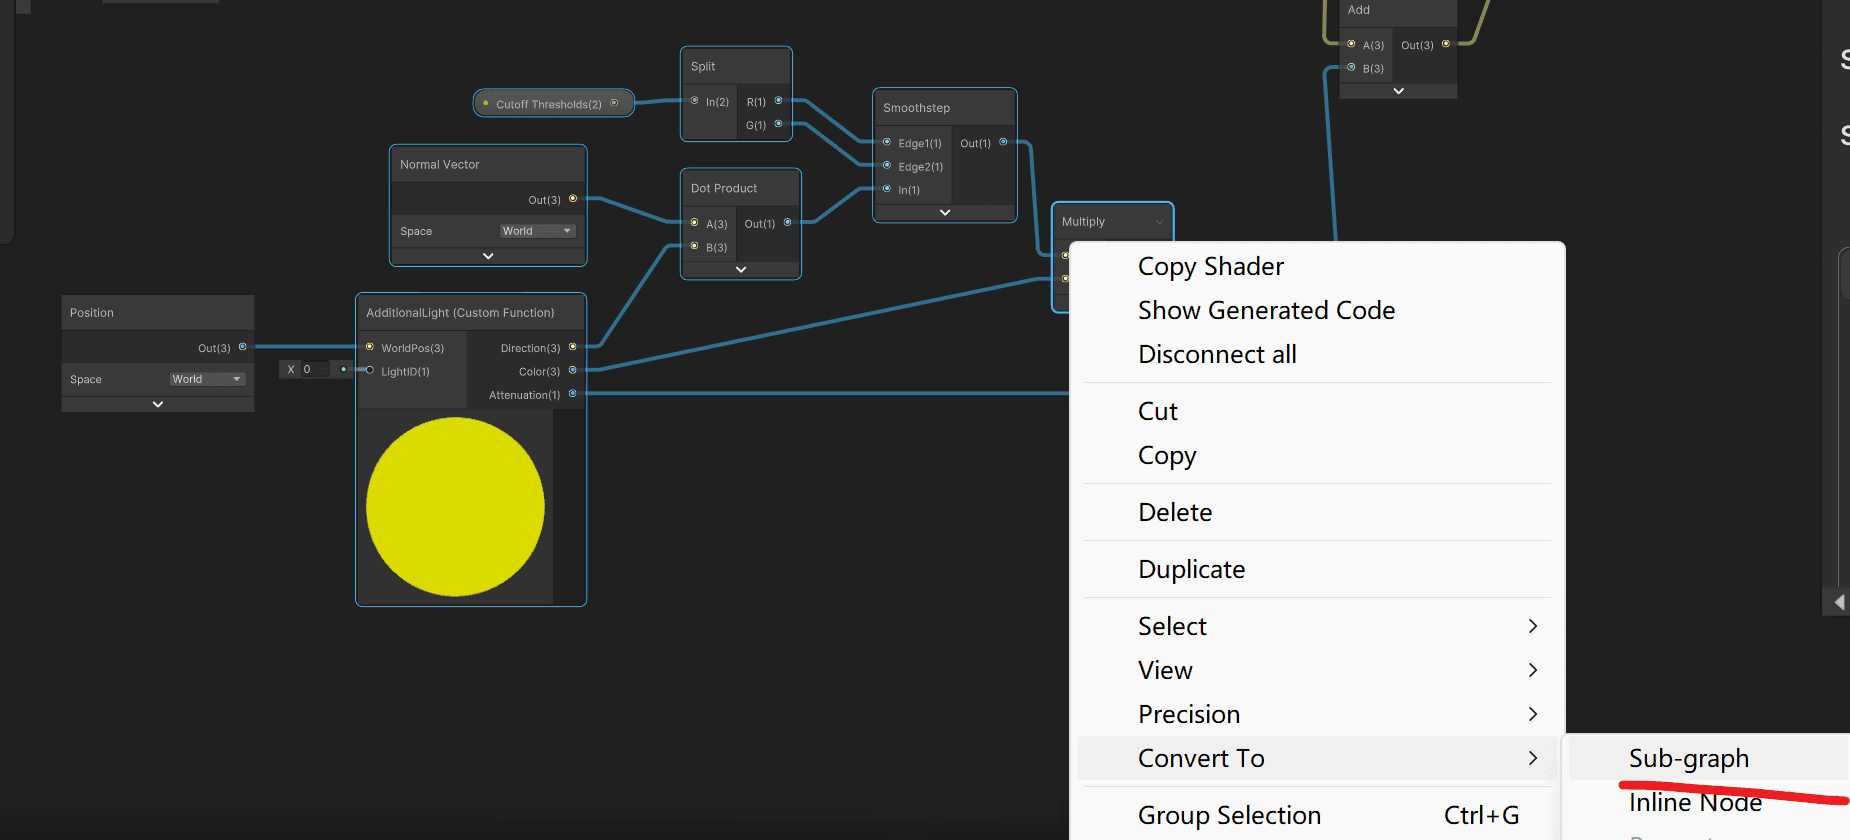
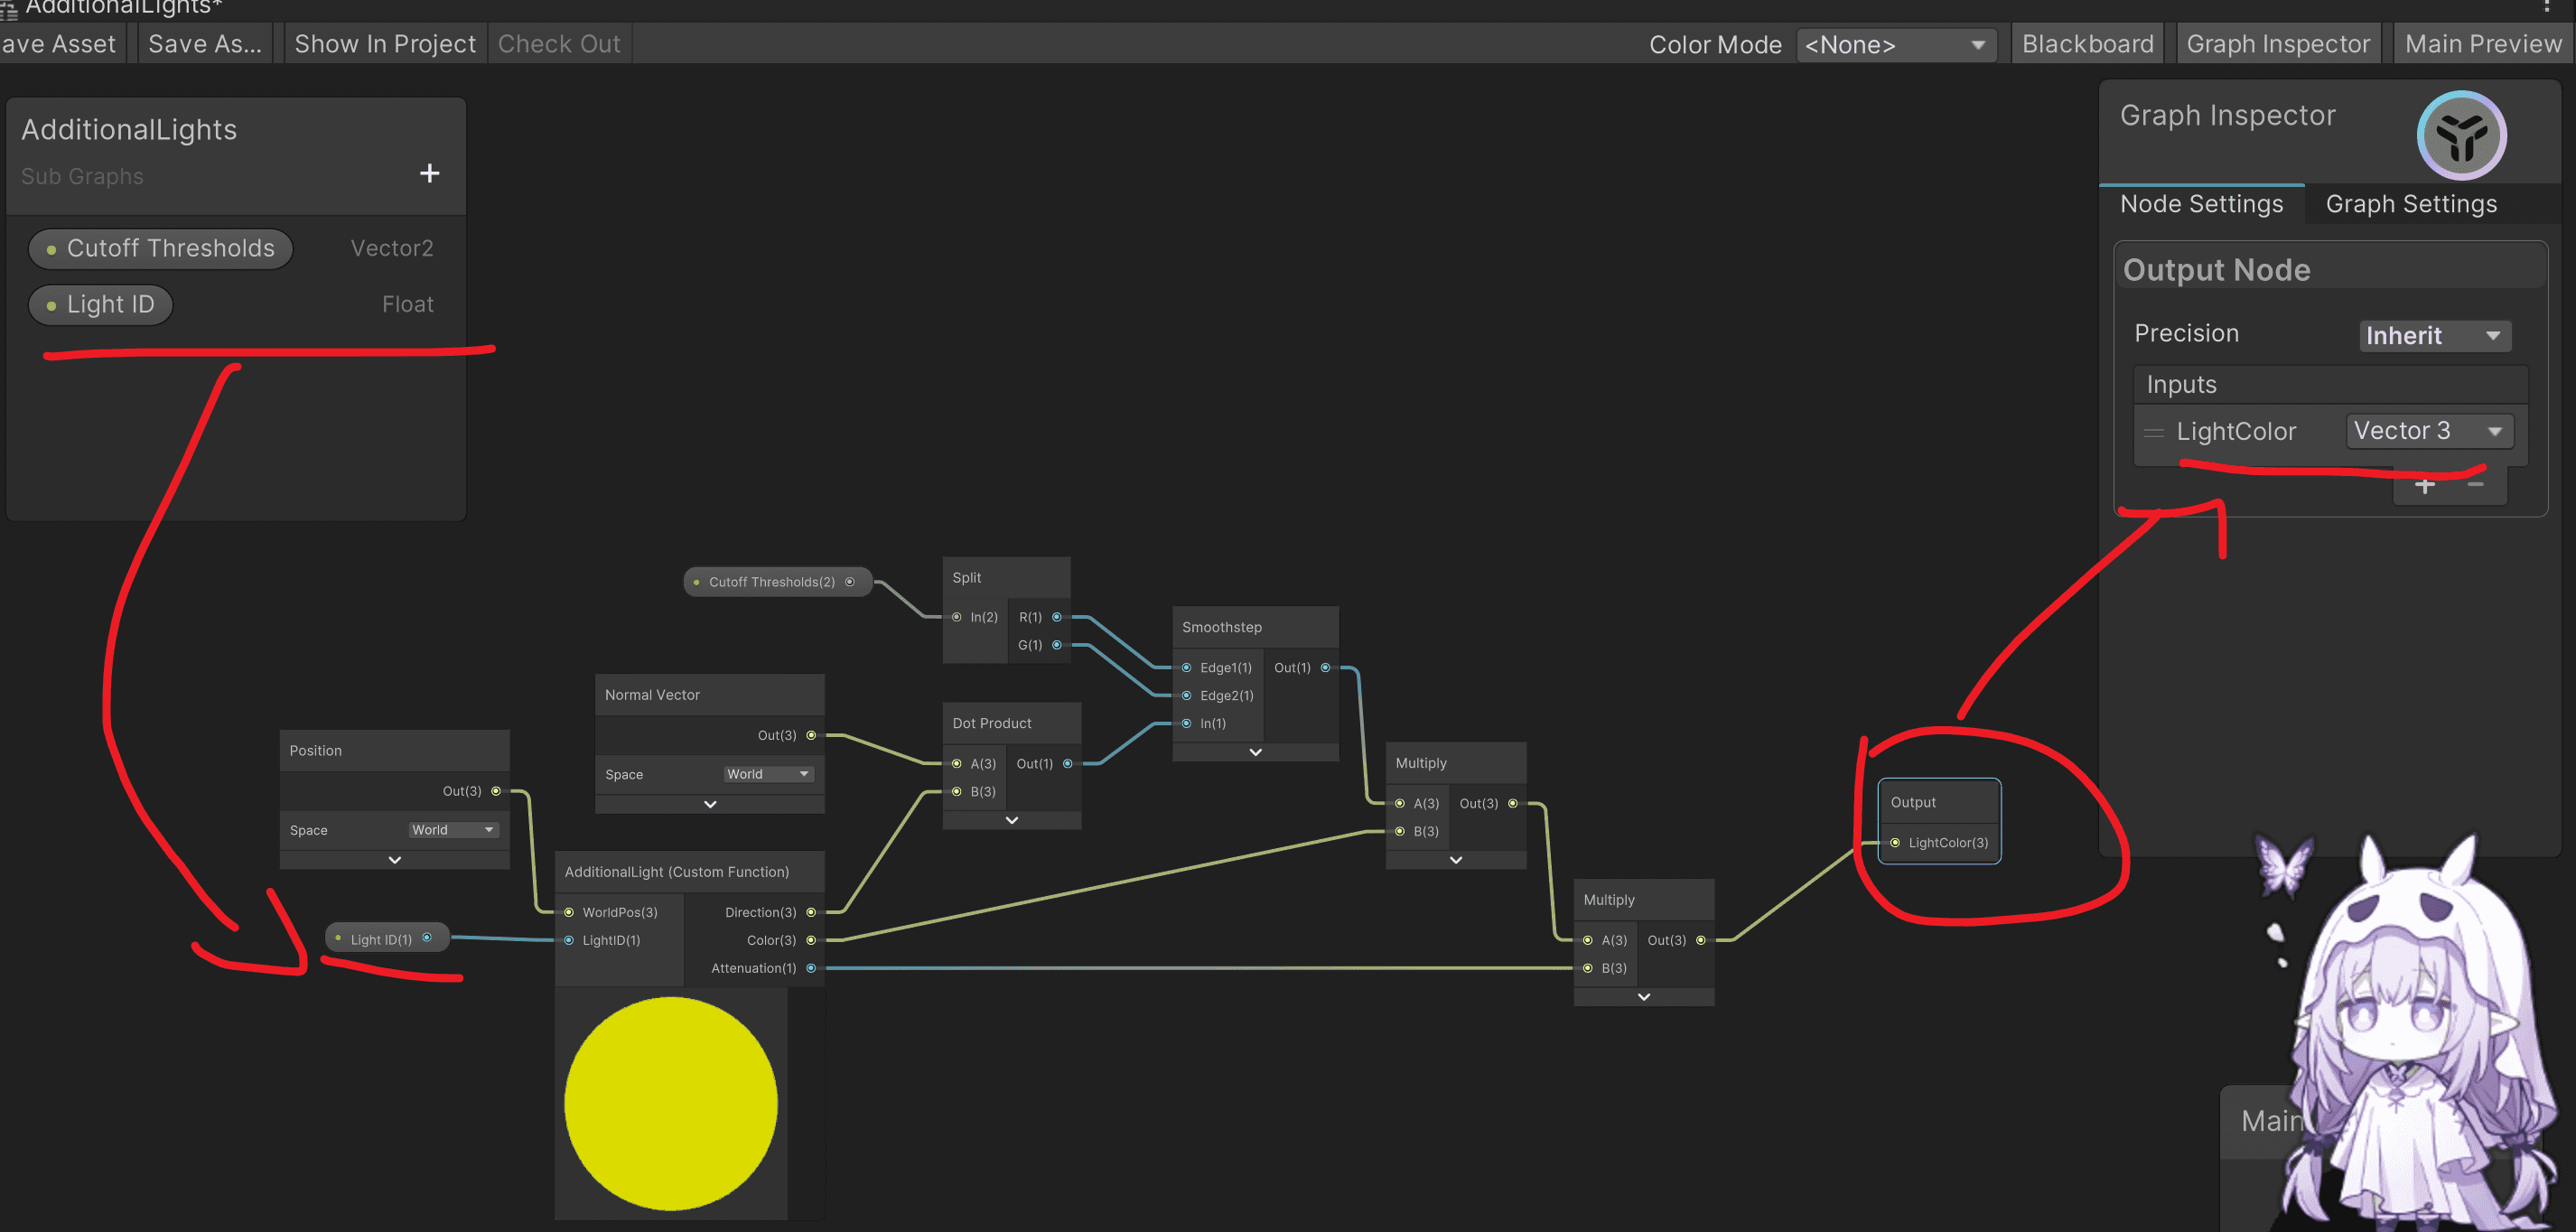
void AdditionalLight_float(float3 WorldPos, int lightID, out float3 Direction, out float3 Color, out float Attenuation) { Direction = normalize(float3(1.0f, 1.0f, 0.0f)); Color = 0.0f; Attenuation = 0.0f;
#ifndef SHADERGRAPH_PREVIEW int lightCount = GetAdditionalLightsCount(); if(lightID < lightCount) { Light light = GetAdditionalLight(lightID, WorldPos); Direction = light.direction; Color = light.color; Attenuation = light.distanceAttenuation; } #endif }
void AdditionalLight_half(half3 WorldPos, int lightID, out half3 Direction, out half3 Color, out half Attenuation) { Direction = normalize(half3(1.0f, 1.0f, 0.0f)); Color = 0.0f; Attenuation = 0.0f;
#ifndef SHADERGRAPH_PREVIEW int lightCount = GetAdditionalLightsCount(); if(lightID < lightCount) { Light light = GetAdditionalLight(lightID, WorldPos); Direction = light.direction; Color = light.color; Attenuation = light.distanceAttenuation; } #endif }
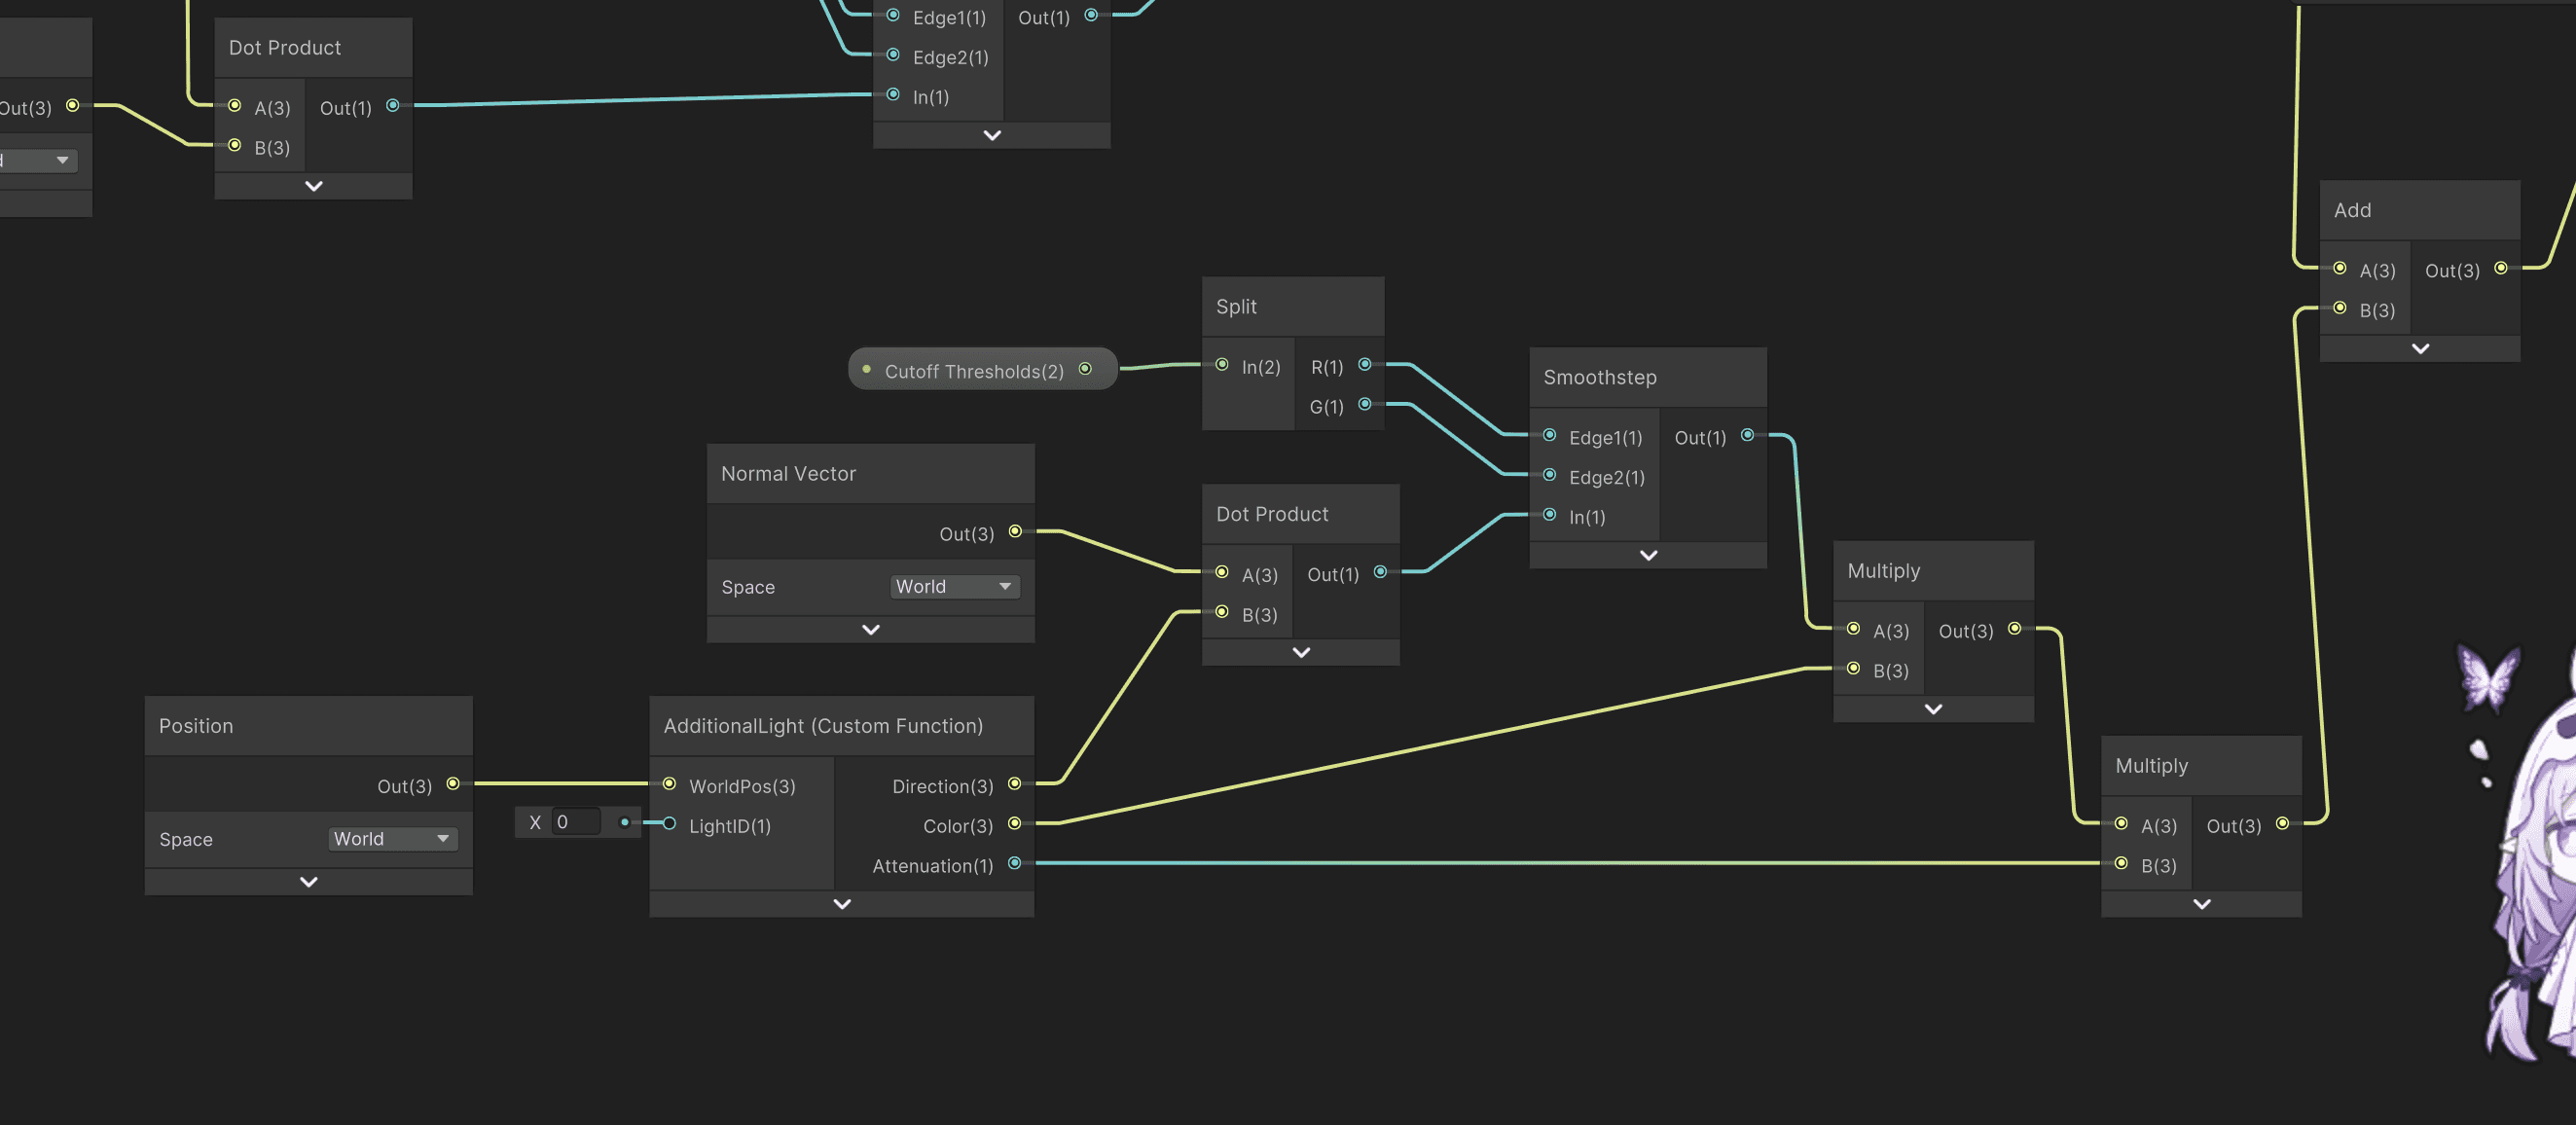
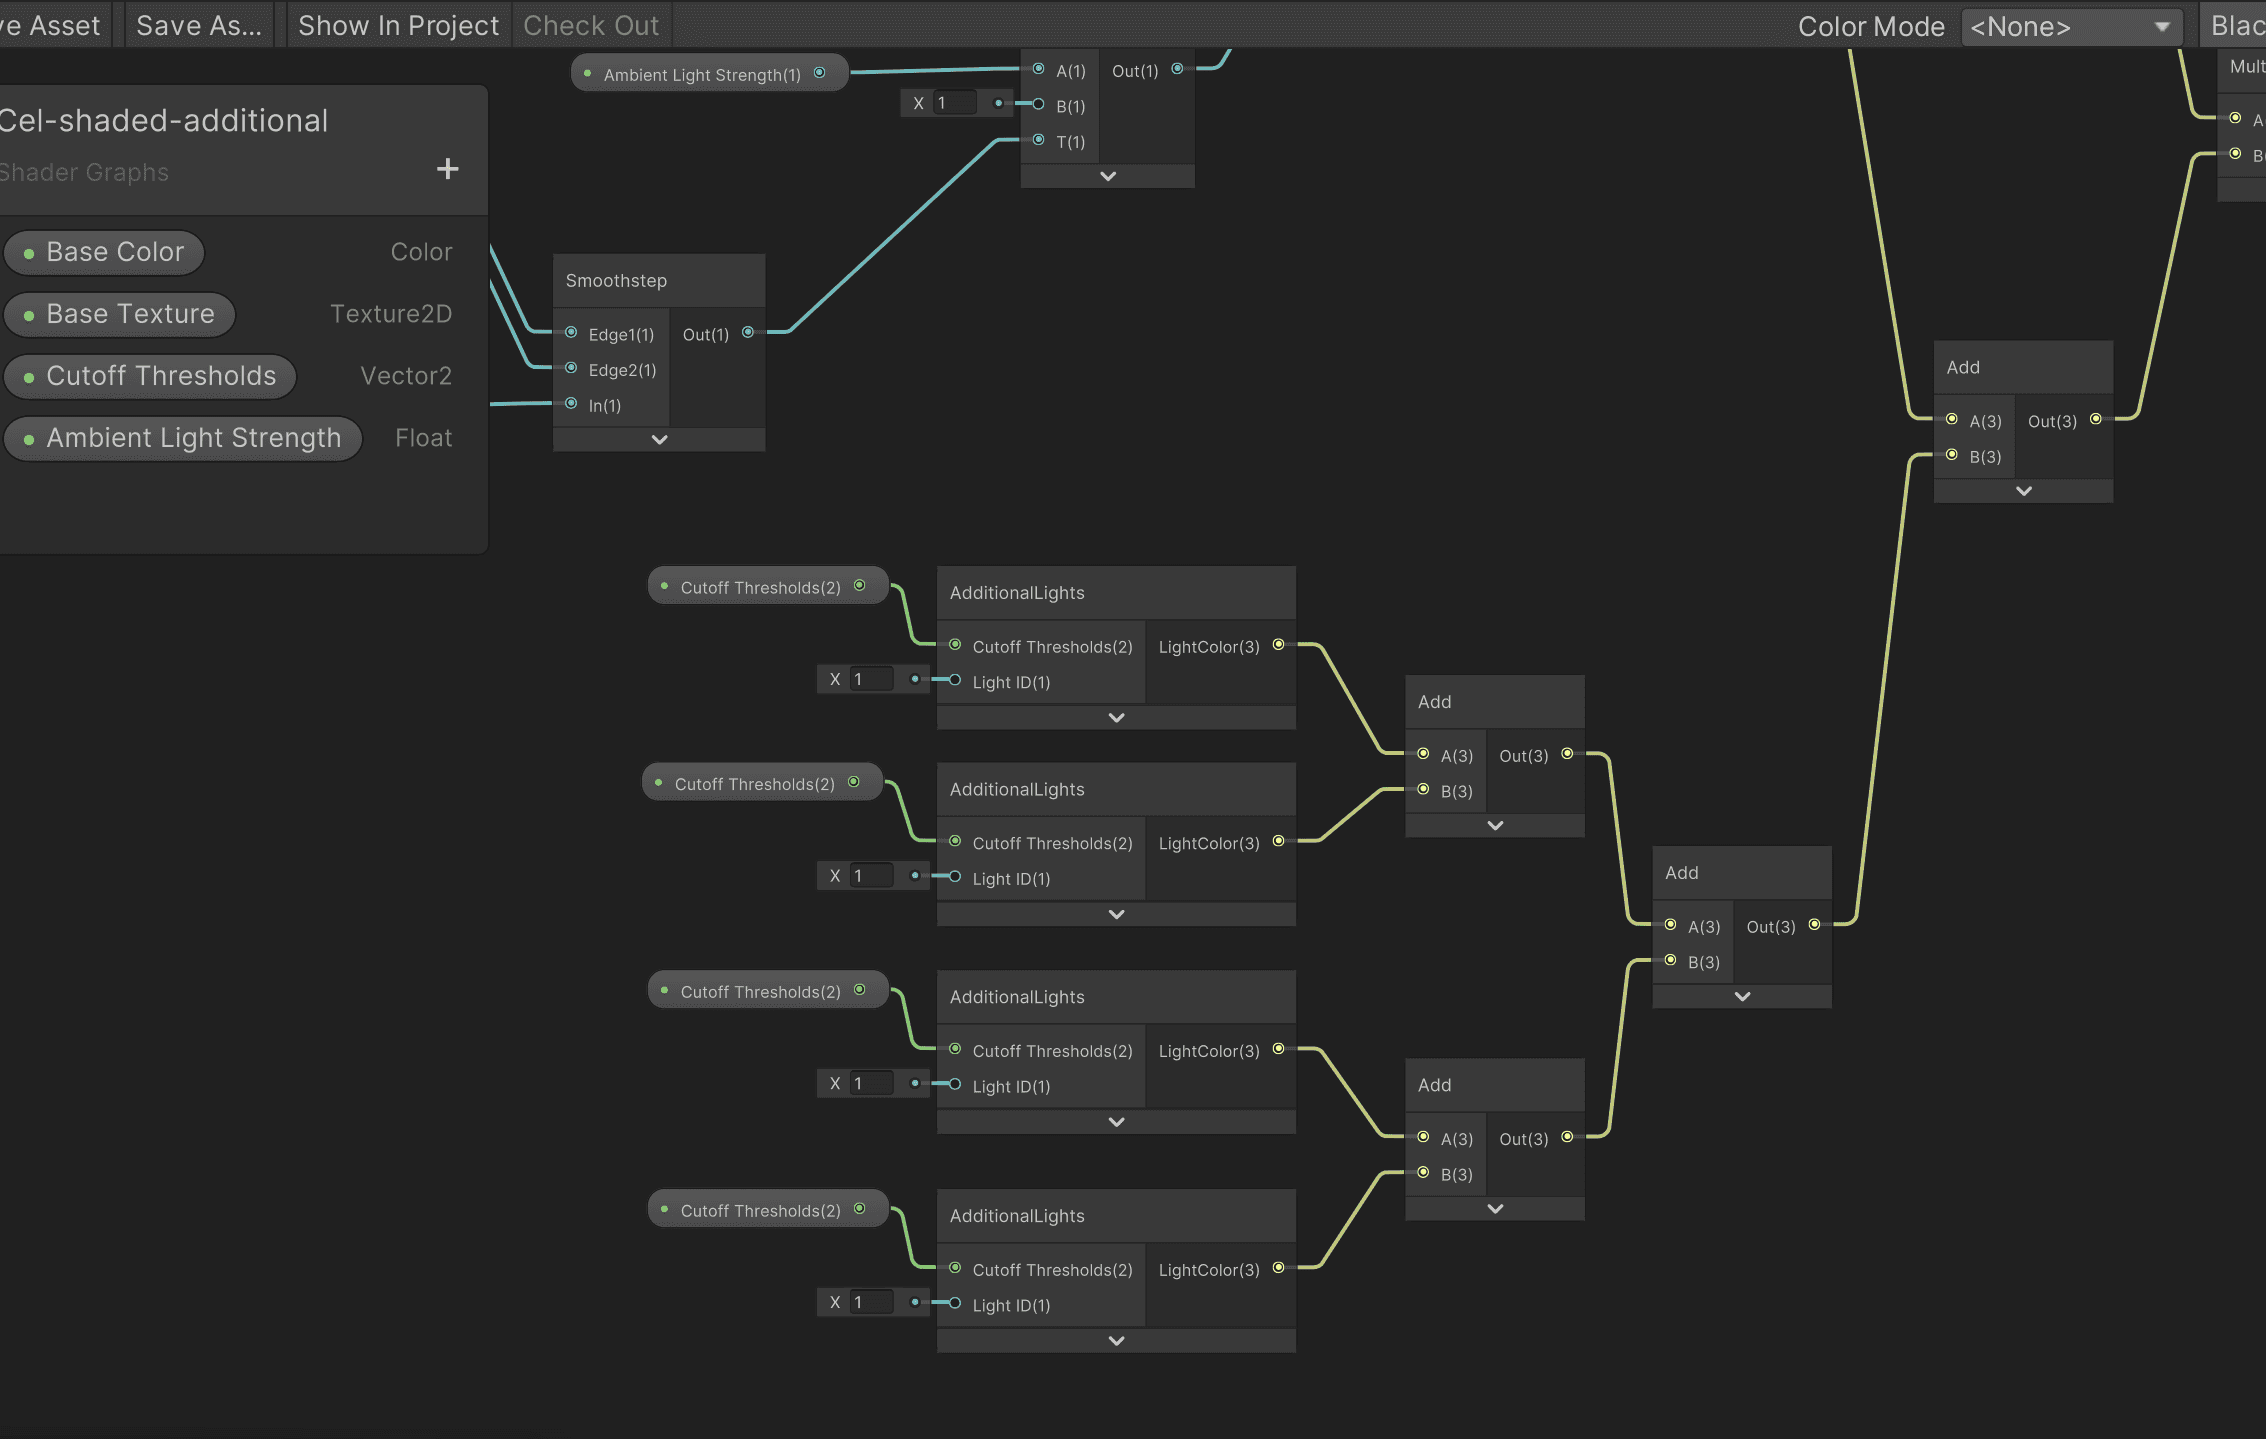
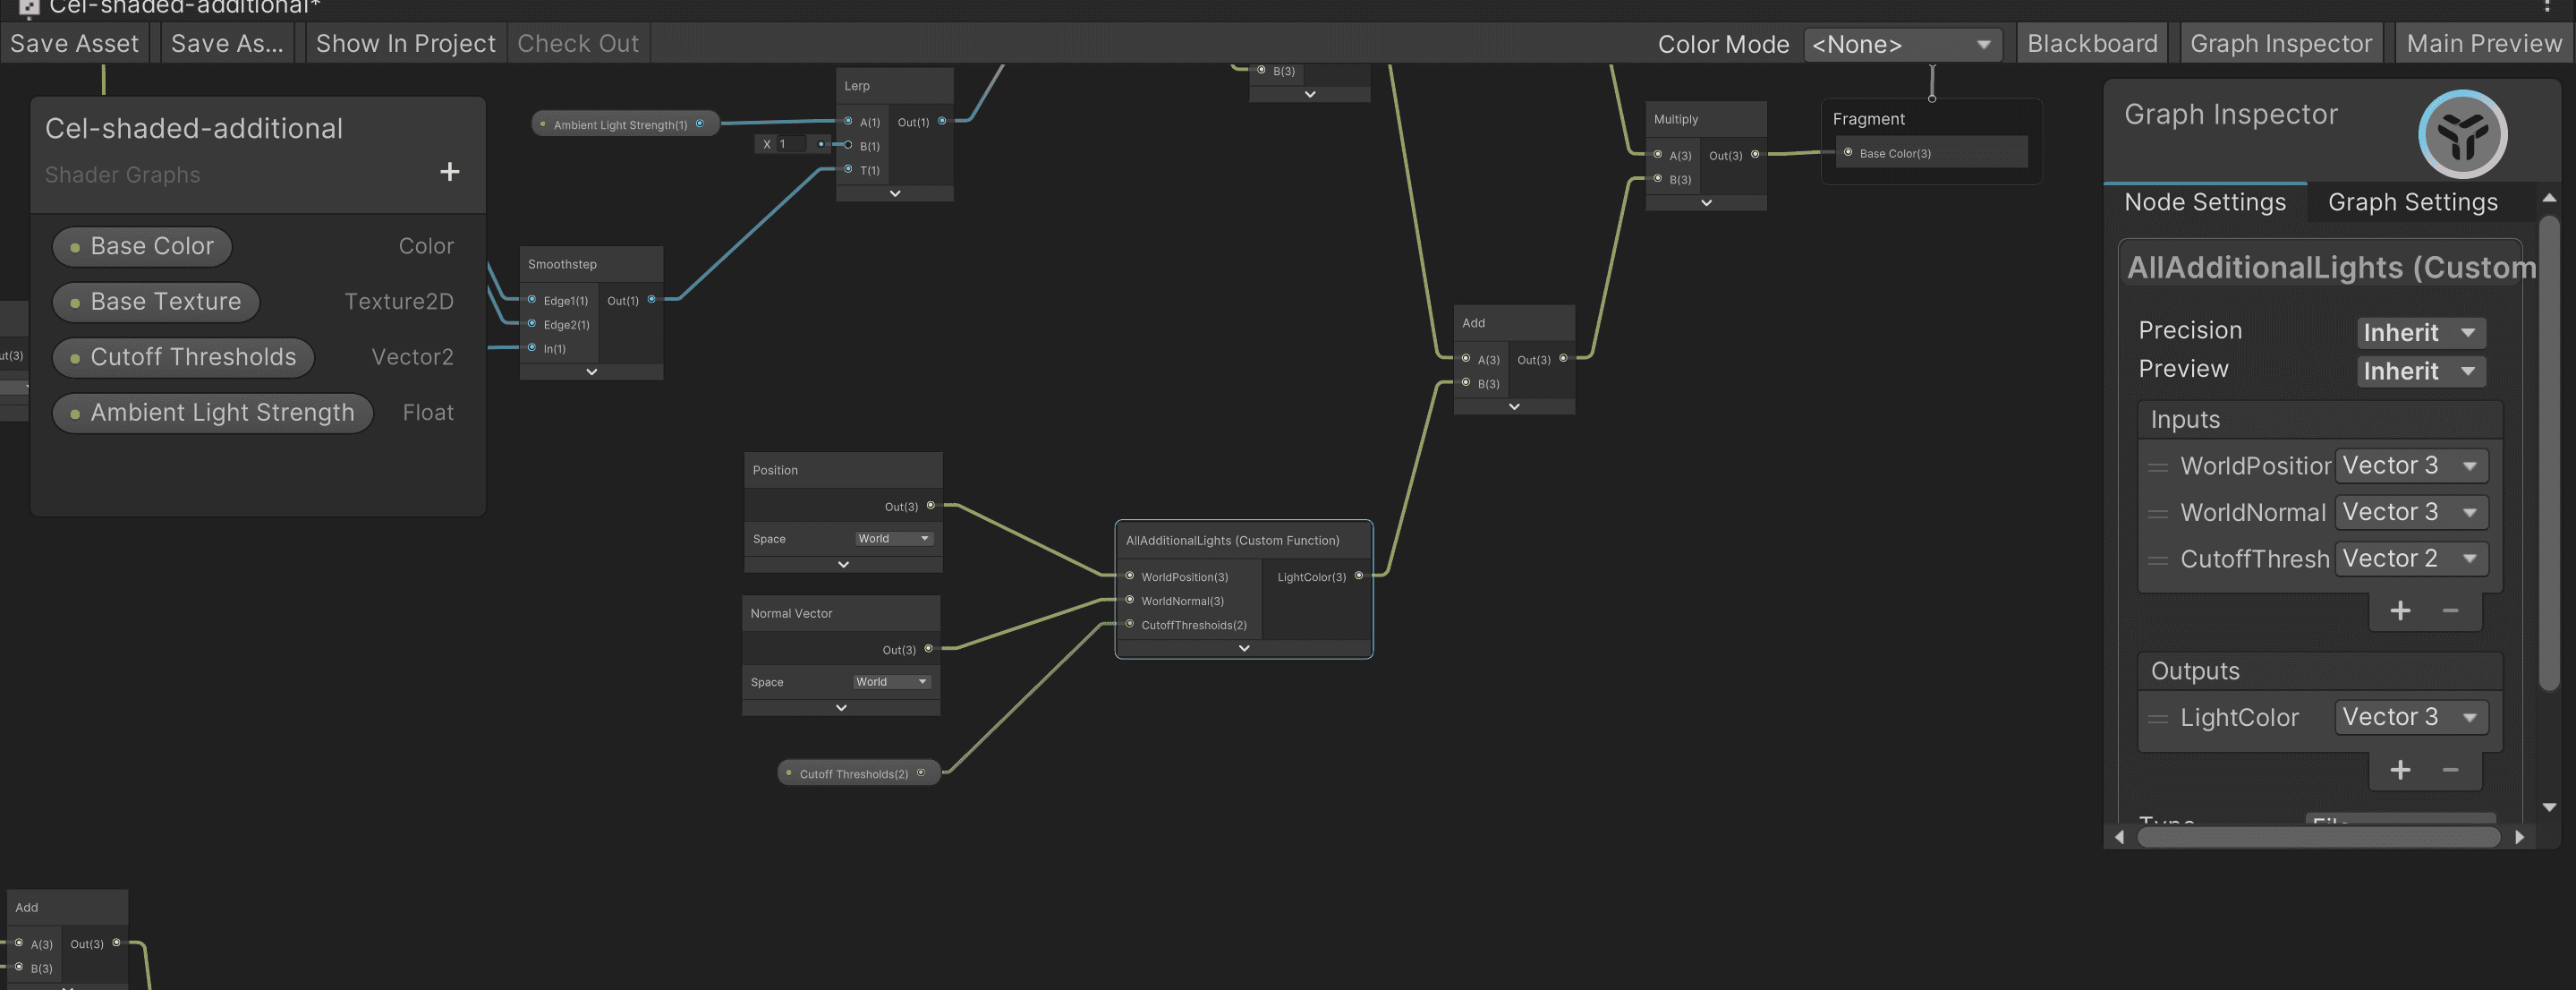
#ifndef SHADERGRAPH_PREVIEW int lightCount = GetAdditionalLightsCount();
for(int i = 0; i < lightCount; ++i) { Light light = GetAdditionalLight(i, WorldPos);
float3 color = dot(light.direction, WorldNormal); color = smoothstep(CutoffThresholds.x, CutoffThresholds.y, color); color *= light.color; color *= light.distanceAttenuation;
#ifndef SHADERGRAPH_PREVIEW int lightCount = GetAdditionalLightsCount();
for(int i = 0; i < lightCount; ++i) { Light light = GetAdditionalLight(i, WorldPos); float3 color = dot(light.direction, WorldNormal); color = smoothstep(CutoffThresholds.x, CutoffThresholds.y, color); color *= light.color; color *= light.distanceAttenuation;
//这个是单精度
void AdditionalLight_float(float3 WorldPos, int lightID, out float3 Direction, out float3 Color, out float Attenuation)
{
    Direction = normalize(float3(1.0f, 1.0f, 0.0f));
    Color = 0.0f;
    Attenuation = 0.0f;

#ifndef SHADERGRAPH_PREVIEW
    int lightCount = GetAdditionalLightsCount();
    if(lightID < lightCount)
    {
        Light light = GetAdditionalLight(lightID, WorldPos);
        Direction = light.direction;
        Color = light.color;
        Attenuation = light.distanceAttenuation;
    }
#endif
}

//这个是半精度
void AdditionalLight_half(half3 WorldPos, int lightID, out half3 Direction, out half3 Color, out half Attenuation)
{
    Direction = normalize(half3(1.0f, 1.0f, 0.0f));
    Color = 0.0f;
    Attenuation = 0.0f;

#ifndef SHADERGRAPH_PREVIEW
    int lightCount = GetAdditionalLightsCount();
    if(lightID < lightCount)
    {
        Light light = GetAdditionalLight(lightID, WorldPos);
        Direction = light.direction;
        Color = light.color;
        Attenuation = light.distanceAttenuation;
    }
#endif
}
#ifndef SHADERGRAPH_PREVIEW int lightCount = GetAdditionalLightsCount();
for(int i = 0; i < lightCount; ++i) { Light light = GetAdditionalLight(i, WorldPos);
float3 color = dot(light.direction, WorldNormal); color = smoothstep(CutoffThresholds.x, CutoffThresholds.y, color); color *= light.color; color *= light.distanceAttenuation;
#ifndef SHADERGRAPH_PREVIEW int lightCount = GetAdditionalLightsCount();
for(int i = 0; i < lightCount; ++i) { Light light = GetAdditionalLight(i, WorldPos); float3 color = dot(light.direction, WorldNormal); color = smoothstep(CutoffThresholds.x, CutoffThresholds.y, color); color *= light.color; color *= light.distanceAttenuation;


评论区