
今天来学学flutter的网络请求
Dio插件的使用
dio 是 Flutter 里最常用的 HTTP 网络请求库之一,很多项目都会用它替代原生的 http 包,因为它功能更完整
(话说看到这个Dio我就想起了某个埃及艳妇 狗头狗头狗头)
OK回归正题
首先根目录执行
flutter pub add dio
打开你的pubspec.yaml文件
可以看到这个
dependencies:
  flutter:
    sdk: flutter

  # The following adds the Cupertino Icons font to your application.
  # Use with the CupertinoIcons class for iOS style icons.
  cupertino_icons: ^1.0.8
  dio: ^5.9.2     #dio下载完成
基本使用
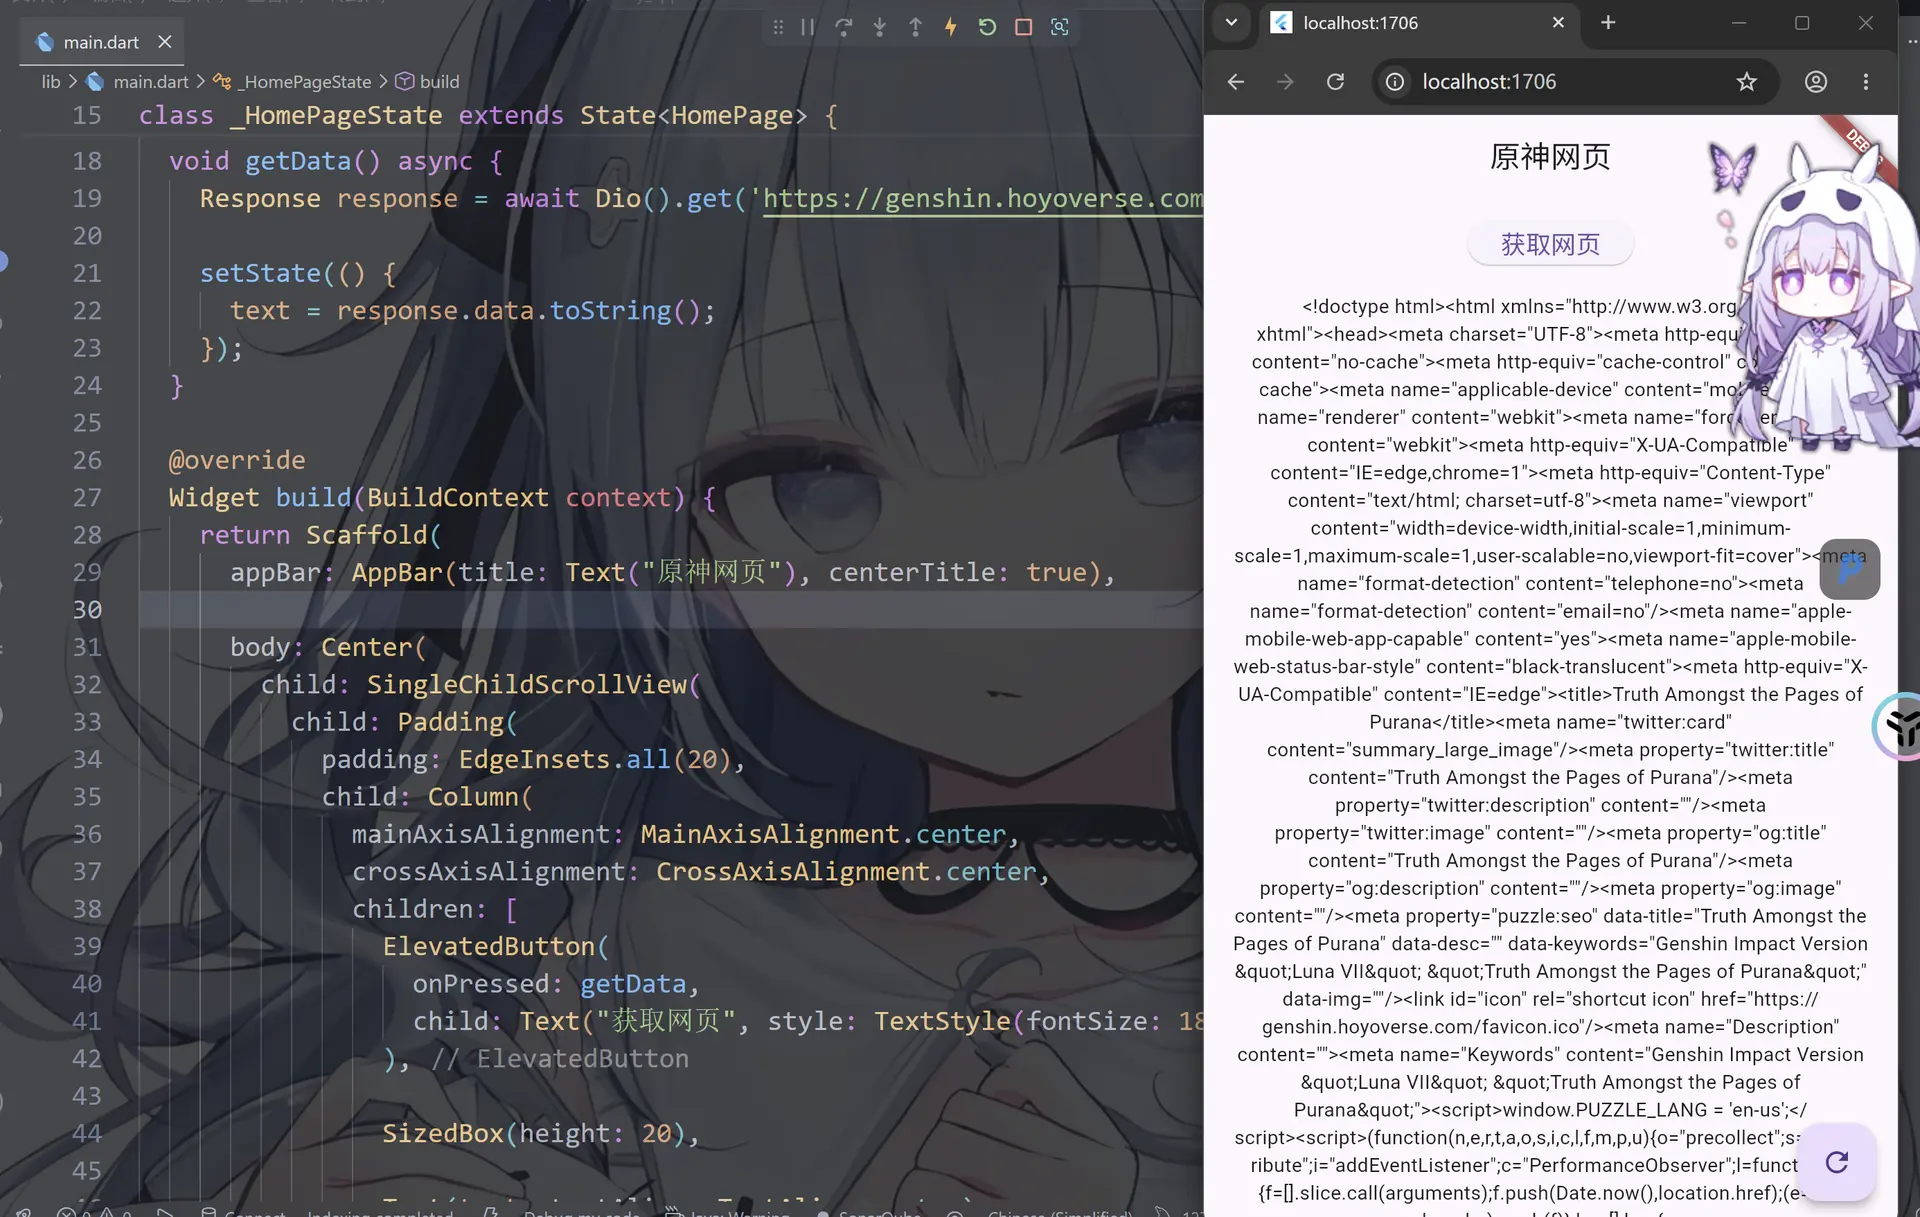
Dio().get(地址).then().catchError()
import 'package:flutter/material.dart';
import 'package:dio/dio.dart';
void main() {
runApp(MaterialApp(home: HomePage()));
}
class HomePage extends StatefulWidget {
const HomePage({super.key});
State<HomePage> createState() => _HomePageState();
}
class _HomePageState extends State<HomePage> {
String text = "点击获取数据";
void getData() async {
Response response = await Dio().get('https://genshin.hoyoverse.com/en/');
setState(() {
text = response.data.toString();
});
}
Widget build(BuildContext context) {
return Scaffold(
appBar: AppBar(title: Text("原神网页"), centerTitle: true),
body: Center(
child: SingleChildScrollView(
child: Padding(
padding: EdgeInsets.all(20),
child: Column(
mainAxisAlignment: MainAxisAlignment.center,
crossAxisAlignment: CrossAxisAlignment.center,
children: [
ElevatedButton(
onPressed: getData,
child: Text("获取网页", style: TextStyle(fontSize: 18)),
),
SizedBox(height: 20),
Text(text, textAlign: TextAlign.center),
],
),
),
),
),
floatingActionButton: FloatingActionButton(
onPressed: getData,
child: Icon(Icons.refresh),
),
);
}
}
封装Dio工具
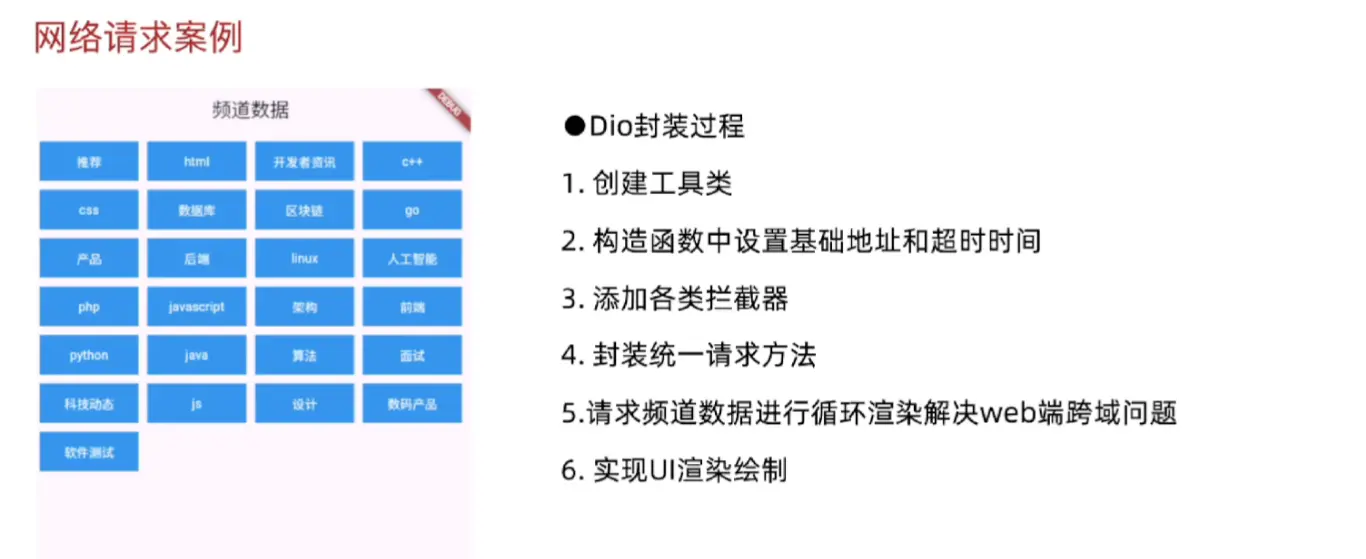
建立连接 → 发送数据 → 等待服务器返回
↑ ↑ ↑
connect send receive
import 'package:flutter/material.dart';
import 'package:dio/dio.dart';

void main() {}

class DioUtils {
  final Dio _dio = Dio(); // 创建Dio实例
  DioUtils() {
    _dio.options.baseUrl = 'https://github.com/'; // 基础地址
    _dio.options.connectTimeout = Duration(seconds: 5); // 连接超时,类型为Duration
    _dio.options.sendTimeout = Duration(seconds: 5); // 发送超时,类型为Duration
    _dio.options.receiveTimeout = Duration(seconds: 5); // 响应超时,类型为Duration
  }
}
我们可以创建Dio工具类和实例对象,但是这种写法较为繁琐
使用“..”级操作符
作用是对同一个对象连续调用多个属性或方法时,不需要反复写对象名
import 'package:flutter/material.dart';
import 'package:dio/dio.dart';

void main() {}

class DioUtils {
  final Dio _dio = Dio(); // 创建Dio实例
  DioUtils() {

    _dio.options
      ..baseUrl =
          'https://github.com/' // 基础地址
      ..connectTimeout =
          Duration(seconds: 5) // 连接超时,类型为Duration
      ..sendTimeout =
          Duration(seconds: 5) // 发送超时,类型为Duration
      ..receiveTimeout = Duration(seconds: 5); // 响应超时,类型为Duration
  }
}
// ❌ 不用级联:重复写对象名
var buffer = StringBuffer();
buffer.write('Hello');
buffer.write(' ');
buffer.write('World');
var result = buffer.toString();

// ✅ 用级联:链式调用,更简洁
var result = (StringBuffer()
  ..write('Hello')
  ..write(' ')
  ..write('World'))
  .toString();
使用BaseOptions
flutter 的 BaseOptions 是 Dio 网络库中的核心配置类,用于定义全局请求的基础参数。它本身不是 Flutter SDK 的一部分,而是来自 dio 包
BaseOptions 封装了所有 HTTP 请求的默认配置,创建 Dio 实例时传入,后续所有请求都会继承这些基础参数
import 'package:flutter/material.dart';
import 'package:dio/dio.dart';

void main() {}

class DioUtils {
  final Dio _dio = Dio(
    BaseOptions(
      baseUrl: 'https://github.com/',
      connectTimeout: Duration(seconds: 5),
      sendTimeout: Duration(seconds: 5),
      receiveTimeout: Duration(seconds: 5),
    ),
  );
}
Dio拦截器(Interceptors)
拦截器是 Dio 的核心机制,允许你在请求发出前和响应返回后插入自定义逻辑,实现统一的日志、鉴权、错误处理、缓存等
Flutter 里的 Dio 拦截器(Interceptors)主要用于统一处理请求、响应、错误,比如:
- 自动添加 Token
- 打印网络日志
- 刷新 Token
- 统一错误处理
- 请求加密/解密
- Loading 状态管理
Dio 的拦截器语法核心是继承 Interceptor,然后重写三个方法:
onRequest()
onResponse()
onError()
三个阶段执行顺序
一次请求:
dio.get()
    |
    ↓
onRequest()
    |
    ↓
服务器
    |
    ↓
onResponse()
    |
    ↓
业务代码
如果失败:
dio.get()
    |
    ↓
onRequest()
    |
    ↓
服务器
    |
    ↓
onError()
基本结构
先导入:
import 'package:dio/dio.dart';
创建 Dio:
final dio = Dio();
添加拦截器:
dio.interceptors.add(
  MyInterceptor(),
);
定义拦截器:
class MyInterceptor extends Interceptor {
void onRequest(
RequestOptions options,
RequestInterceptorHandler handler,
) {
print("请求地址: ${options.uri}");
handler.next(options);
}
void onResponse(
Response response,
ResponseInterceptorHandler handler,
) {
print("响应数据: ${response.data}");
handler.next(response);
}
void onError(
DioException err,
ErrorInterceptorHandler handler,
) {
print("请求失败: ${err.message}");
handler.next(err);
}
}
handler 三种操作
Request
handler.next(options);
意思: 处理完了,继续发送请求
Response
handler.next(response);
意思: 继续返回数据
Error
handler.next(err);
意思: 继续抛错误
我们先试一下在终端输出
其中onRequest() onResponse() onError()函数里的参数可以直接写参数名,无需声明类型
import 'package:dio/dio.dart';

void main() async {
  Dio dio = Dio();

  dio.interceptors.add(
    InterceptorsWrapper(
      // 请求前
      onRequest: (options, handler) {
        print("===发送请求===");
        print("请求地址: ${options.uri}");

        handler.next(options);
      },

      // 成功返回
      onResponse: (response, handler) {
        print("===收到响应===");
        print(response.data);

        handler.next(response);
      },

      // 出错
      onError: (error, handler) {
        print("===发生错误===");
        print(error.message);

        handler.next(error);
      },
    ),
  );

  try {
    Response res = await dio.get(
      'https://jsonplaceholder.typicode.com/posts/1',
    );

    print("===最终结果===");
    print(res.data);
  } catch (e) {
    print(e);
  }
}
import 'package:flutter/material.dart';
import 'package:dio/dio.dart';

void main() {}

class DioUtils {
  final Dio _dio = Dio(); // 创建Dio实例

  //设置基础地址和超时时间
  DioUtils() {
    _dio.options
      ..baseUrl =
          'https://jsonplaceholder.typicode.com' // 基础地址
      ..connectTimeout =
          Duration(seconds: 5) // 连接超时,类型为Duration
      ..sendTimeout =
          Duration(seconds: 5) // 发送超时,类型为Duration
      ..receiveTimeout = Duration(seconds: 5); // 响应超时,类型为Duration

    // 添加请求拦截器
    _addInterceptors();
  }

  // 添加拦截器
  void _addInterceptors() {
    _dio.interceptors.add(
      InterceptorsWrapper(
        // 请求拦截器
        onRequest: (context, handler) {
          handler.next(context);
        },
        // 响应拦截器
        onResponse: (context, handler) {
          //http状态码为2XX成功,3XX跳转,4XX错误,5XX服务器错误
          if (context.statusCode! >= 200 && context.statusCode! < 300) {
            handler.next(context);
            return;
          }
          // 其他状态码视为错误,抛出异常
          handler.reject(DioException(requestOptions: context.requestOptions));
        },
        // 错误拦截器
        onError: (context, handler) {
          handler.reject(context);
        },
      ),
    );
  }

  //向外暴露get方法,封装请求
  Future<Response> get(String url, {Map<String, dynamic>? params}) {
    return _dio.get(url, queryParameters: params);
  }
}
然后与MaterialApp结合
import 'package:flutter/material.dart';
import 'package:dio/dio.dart';
void main() {
runApp(const MaterialApp(home: DioDemoPage()));
}
class DioDemoPage extends StatefulWidget {
const DioDemoPage({super.key});
State<DioDemoPage> createState() => _DioDemoPageState();
}
class _DioDemoPageState extends State<DioDemoPage> {
final Dio dio = Dio();
String result = "点击按钮发送请求";
void initState() {
super.initState();
dio.interceptors.add(
InterceptorsWrapper(
// 请求前
onRequest: (options, handler) {
print("===== 请求拦截器 =====");
print("请求地址: ${options.uri}");
handler.next(options);
},
// 请求成功
onResponse: (response, handler) {
print("===== 响应拦截器 =====");
print("状态码: ${response.statusCode}");
handler.next(response);
},
// 请求失败
onError: (error, handler) {
print("===== 错误拦截器 =====");
print(error.message);
handler.next(error);
},
),
);
}
Future<void> loadData() async {
try {
Response response = await dio.get(
"https://jsonplaceholder.typicode.com/posts/1",
);
setState(() {
result = response.data.toString();
});
} catch (e) {
setState(() {
result = e.toString();
});
}
}
Widget build(BuildContext context) {
return Scaffold(
appBar: AppBar(title: const Text("Dio拦截器演示"), centerTitle: true),
body: Padding(
padding: const EdgeInsets.all(16),
child: Center(
child: Column(
children: [
ElevatedButton(onPressed: loadData, child: const Text("发送请求")),
const SizedBox(height: 20),
Expanded(child: SingleChildScrollView(child: Text(result))),
],
),
),
),
);
}
}
初始化获取数据
我们使用测试网站https://jsonplaceholder.typicode.com/
我们可以使用如下后缀来测试数据
| 路径 | 数量 |
|---|---|
| /posts | 100 posts |
| /comments | 500 comments |
| /albums | 100 albums |
| /photos | 5000 photos |
| /todos | 200 todos |
| /users | 10 users |
这里我们使用/posts/1获得第一篇测试文章的数据
| GET | /posts |
|---|---|
| GET | /posts/1 |
| GET | /posts/1/comments |
| GET | /comments?postId=1 |
| POST | /posts |
| PUT | /posts/1 |
| PATCH | /posts/1 |
| DELETE | /posts/1 |
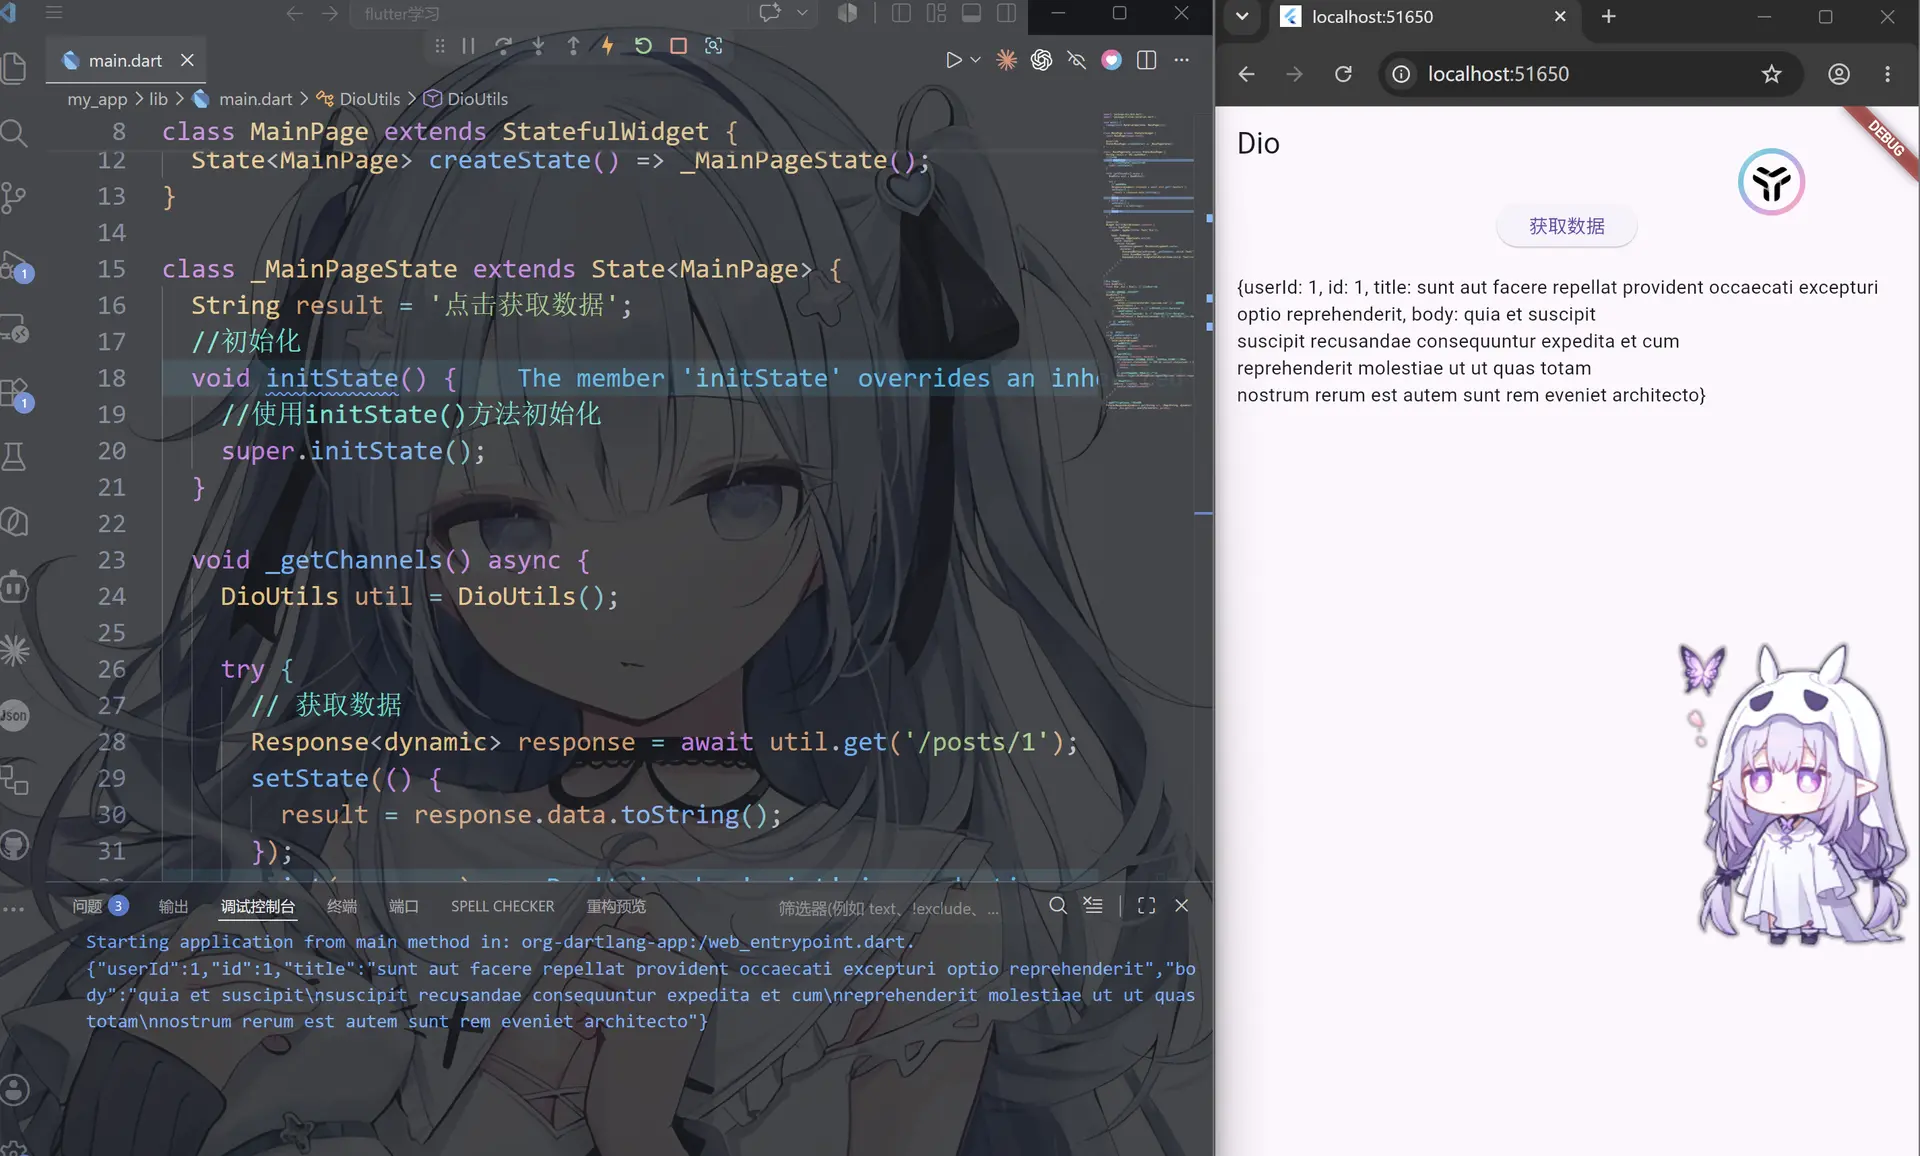
对比一下网站内容,完全一致
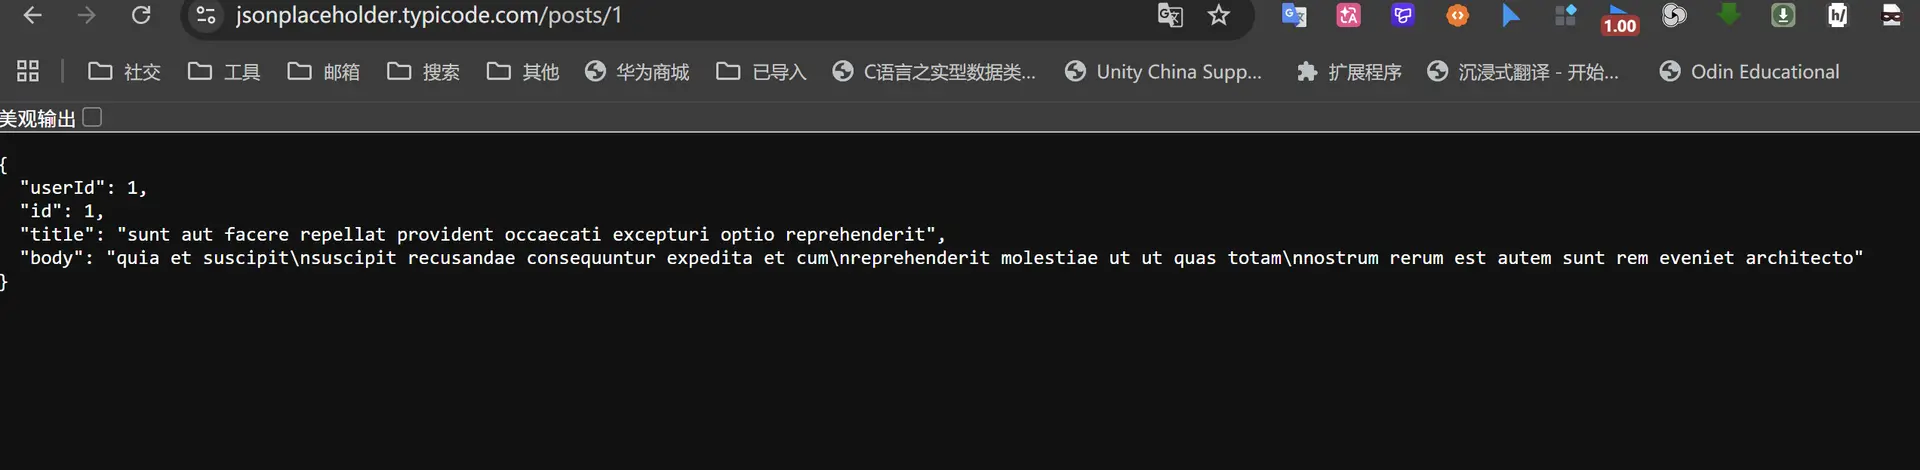
import 'package:dio/dio.dart';
import 'package:flutter/material.dart';
void main() {
runApp(const MaterialApp(home: MainPage()));
}
class MainPage extends StatefulWidget {
const MainPage({super.key});
State<MainPage> createState() => _MainPageState();
}
class _MainPageState extends State<MainPage> {
String result = '点击获取数据';
//初始化
void initState() {
//使用initState()方法初始化
super.initState();
}
void _getChannels() async {
DioUtils util = DioUtils();
try {
// 获取数据
Response<dynamic> response = await util.get('/posts/1');
setState(() {
result = response.data.toString();
});
print(response);
} catch (e) {
setState(() {
result = e.toString();
});
print(e);
}
}
Widget build(BuildContext context) {
return Scaffold(
appBar: AppBar(title: Text('Dio')),
body: Padding(
padding: EdgeInsets.all(16),
child: Center(
child: Column(
mainAxisAlignment: MainAxisAlignment.center,
children: [
ElevatedButton(onPressed: _getChannels, child: Text("获取数据")),
const SizedBox(height: 20),
Expanded(child: SingleChildScrollView(child: Text(result))),
],
),
),
),
);
}
}
//Dio 工具类
class DioUtils {
final Dio _dio = Dio(); // 创建Dio实例
//设置基础地址和超时时间
DioUtils() {
_dio.options
..baseUrl =
'https://jsonplaceholder.typicode.com' // 基础地址
..connectTimeout =
Duration(seconds: 5) // 连接超时,类型为Duration
// ..sendTimeout =
// Duration(seconds: 5) // 发送超时,类型为Duration
..receiveTimeout = Duration(seconds: 5); // 响应超时,类型为Duration
// 添加请求拦截器
_addInterceptors();
}
// 添加拦截器
void _addInterceptors() {
_dio.interceptors.add(
InterceptorsWrapper(
// 请求拦截器
onRequest: (context, handler) {
handler.next(context);
},
// 响应拦截器
onResponse: (context, handler) {
//http状态码为2XX成功,3XX跳转,4XX错误,5XX服务器错误
if (context.statusCode! >= 200 && context.statusCode! < 300) {
handler.next(context);
return;
}
// 其他状态码视为错误,抛出异常
handler.reject(DioException(requestOptions: context.requestOptions));
},
// 错误拦截器
onError: (context, handler) {
handler.reject(context);
},
),
);
}
//向外暴露get方法,封装请求
Future<Response<dynamic>> get(String url, {Map<String, dynamic>? params}) {
return _dio.get(url, queryParameters: params);
}
}
web端跨域问题
默认情况下,flutter运行 web 端加载网络资源会报跨域可能提示错误,解决方法是:
首先在flutter/packages/flutter_tools/lib/src/web/chrome.dart里添加’–disable-web-security’,
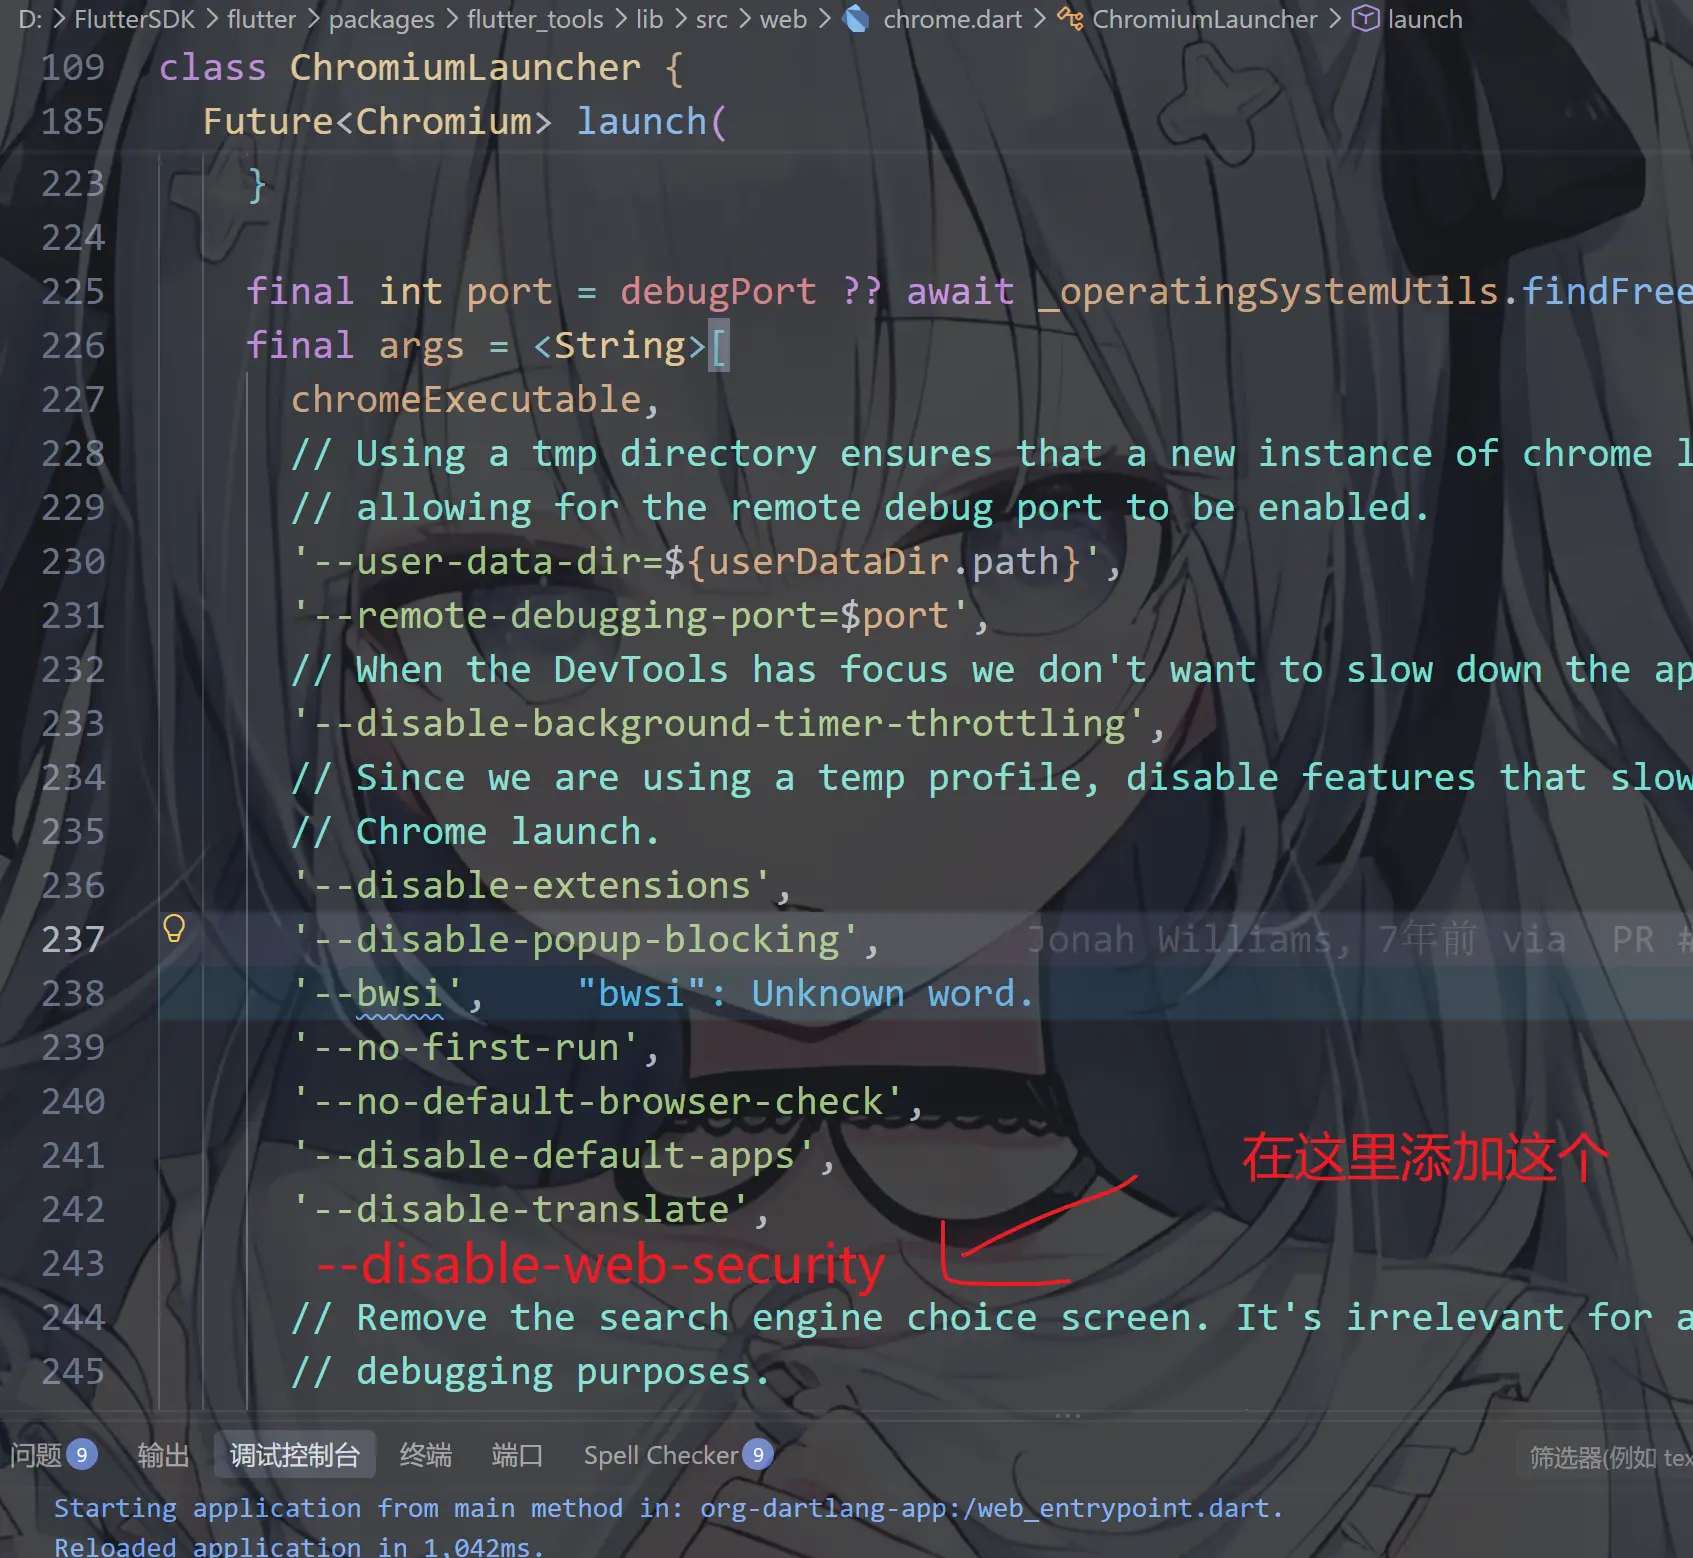
然后删除flutter/bin/cache/下的 flutter_tools.snaphot和flutter_tools.stamp缓存文件
最后执行 flutter doctor -v
然后重新运行项目
这个我们单独在一篇文章里解释
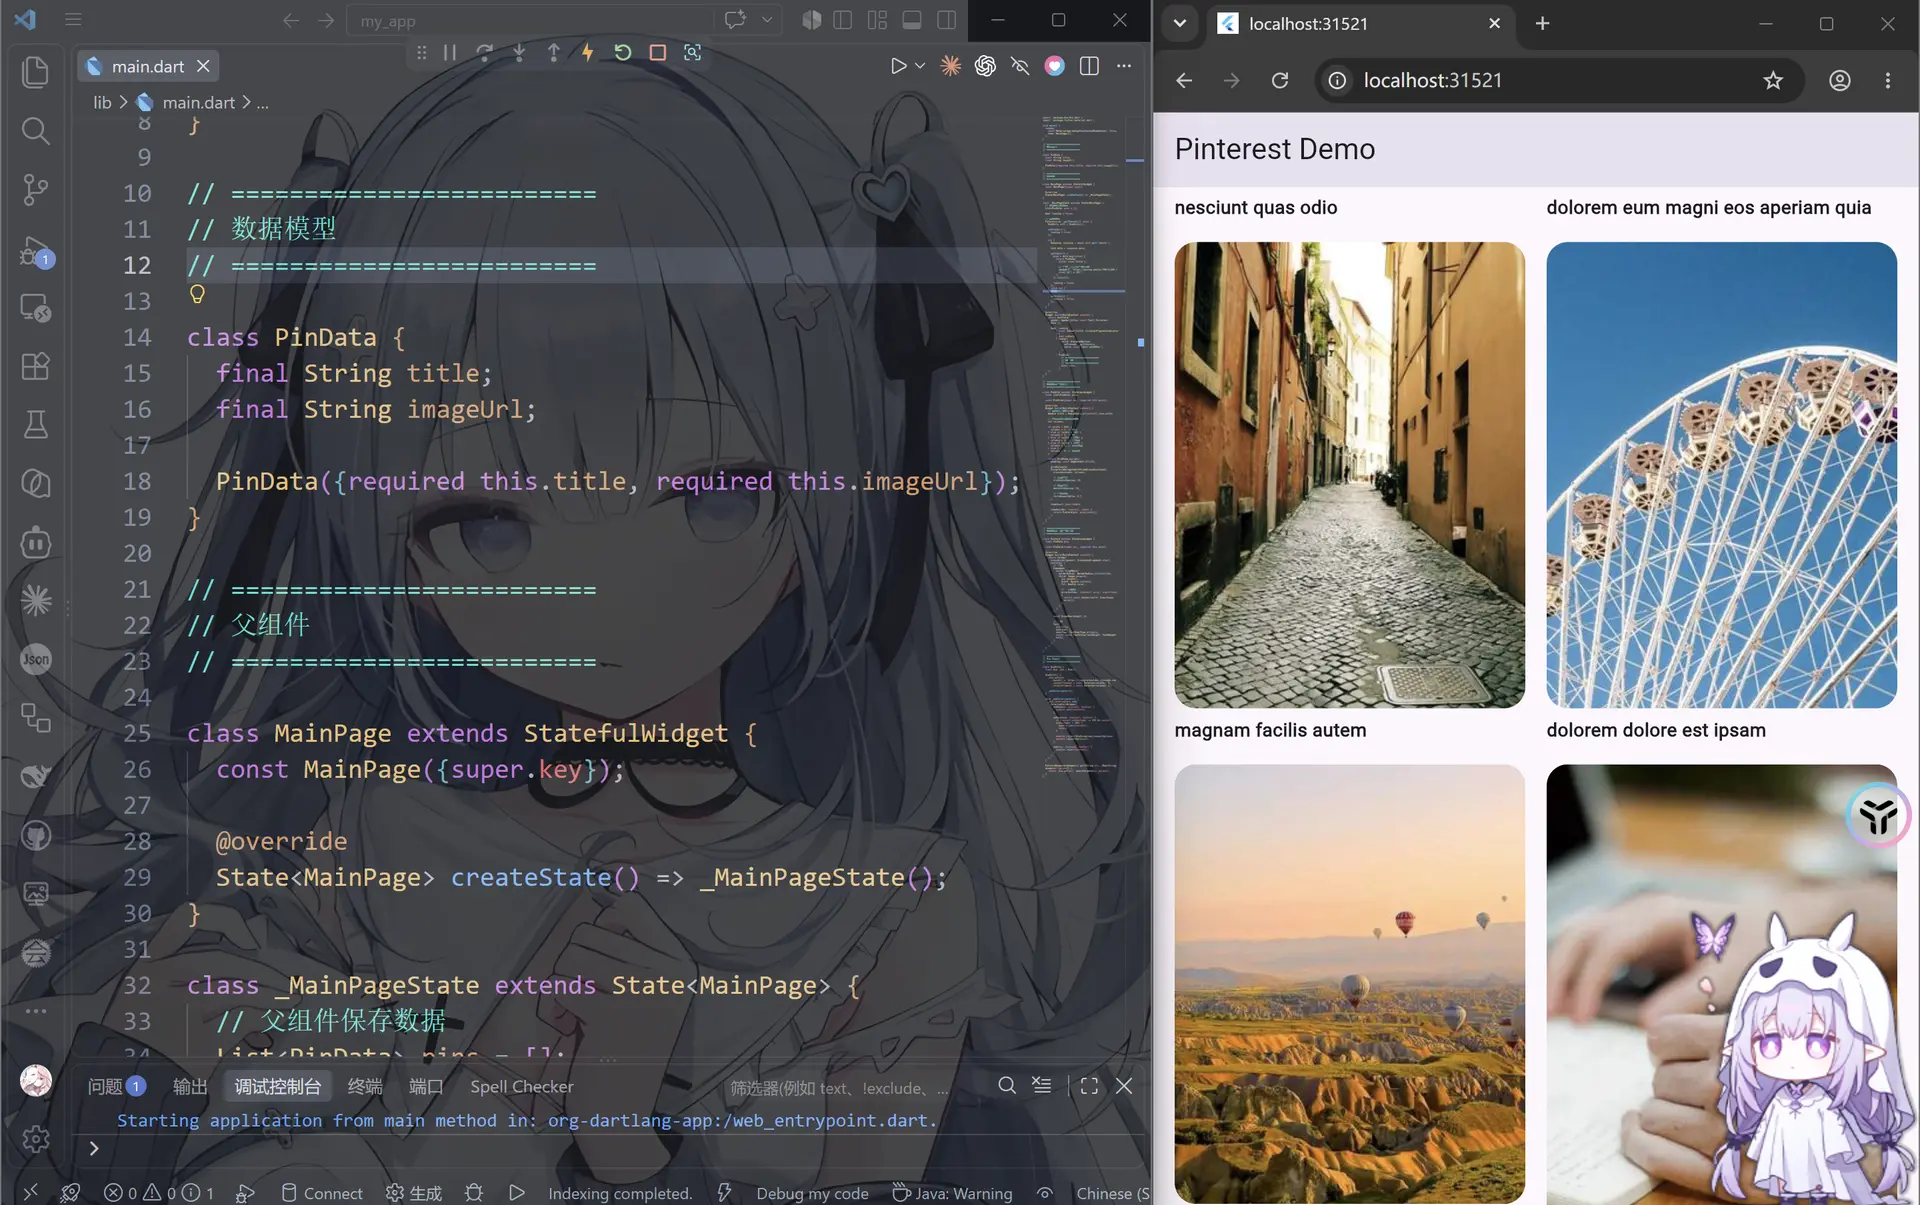
父传子实现
import 'package:dio/dio.dart';
import 'package:flutter/material.dart';
void main() {
runApp(
const MaterialApp(debugShowCheckedModeBanner: false, home: MainPage()),
);
}
// =========================
// 数据模型
// =========================
class PinData {
final String title;
final String imageUrl;
PinData({required this.title, required this.imageUrl});
}
// =========================
// 父组件
// =========================
class MainPage extends StatefulWidget {
const MainPage({super.key});
State<MainPage> createState() => _MainPageState();
}
class _MainPageState extends State<MainPage> {
// 父组件保存数据
List<PinData> pins = [];
bool loading = false;
// 获取数据
Future<void> _getChannels() async {
DioUtils util = DioUtils();
setState(() {
loading = true;
});
try {
Response response = await util.get('/posts');
List data = response.data;
setState(() {
pins = data.map((item) {
return PinData(
title: item['title'],
// 暂时使用随机图片测试
imageUrl: 'https://picsum.photos/300/${300 + item['id'] * 20}',
);
}).toList();
loading = false;
});
} catch (e) {
print(e);
setState(() {
loading = false;
});
}
}
Widget build(BuildContext context) {
return Scaffold(
appBar: AppBar(title: const Text('Pinterest Demo')),
body: loading
? const Center(child: CircularProgressIndicator())
: pins.isEmpty
? Center(
child: ElevatedButton(
onPressed: _getChannels,
child: const Text('获取数据'),
),
)
: PinGrid(
// =========================
// 父传子
// =========================
pins: pins,
),
);
}
}
// =========================
// 子组件:图片网格
// =========================
class PinGrid extends StatelessWidget {
final List<PinData> pins;
const PinGrid({super.key, required this.pins});
Widget build(BuildContext context) {
// 获取当前窗口宽度
double width = MediaQuery.of(context).size.width;
// 根据屏幕宽度决定列数
int columns;
if (width < 600) {
columns = 2; // 手机
} else if (width < 900) {
columns = 3; // 平板
} else if (width < 1200) {
columns = 4; // 小电脑
} else if (width < 1600) {
columns = 5; // 普通电脑
} else {
columns = 6; // 大屏幕
}
return GridView.builder(
padding: const EdgeInsets.all(16),
gridDelegate: SliverGridDelegateWithFixedCrossAxisCount(
crossAxisCount: columns,
// 横向间距
crossAxisSpacing: 16,
// 纵向间距
mainAxisSpacing: 16,
// 卡片比例
childAspectRatio: 0.7,
),
itemCount: pins.length,
itemBuilder: (context, index) {
return PinCard(pin: pins[index]);
},
);
}
}
// =========================
// 子组件:一张图片卡片
// =========================
class PinCard extends StatelessWidget {
final PinData pin;
const PinCard({super.key, required this.pin});
Widget build(BuildContext context) {
return Column(
crossAxisAlignment: CrossAxisAlignment.start,
children: [
// 图片
Expanded(
child: ClipRRect(
borderRadius: BorderRadius.circular(16),
child: Image.network(
pin.imageUrl,
width: double.infinity,
fit: BoxFit.cover,
// 加载失败
errorBuilder: (context, error, stackTrace) {
return const Center(child: Icon(Icons.error));
},
),
),
),
const SizedBox(height: 6),
// 标题
Text(
pin.title,
maxLines: 2,
overflow: TextOverflow.ellipsis,
style: const TextStyle(fontWeight: FontWeight.bold),
),
],
);
}
}
// =========================
// Dio 工具类
// =========================
class DioUtils {
final Dio _dio = Dio();
DioUtils() {
_dio.options
..baseUrl = 'https://jsonplaceholder.typicode.com'
..connectTimeout = const Duration(seconds: 5)
..receiveTimeout = const Duration(seconds: 5);
_addInterceptors();
}
void _addInterceptors() {
_dio.interceptors.add(
InterceptorsWrapper(
onRequest: (context, handler) {
handler.next(context);
},
onResponse: (context, handler) {
if (context.statusCode! >= 200 && context.statusCode! < 300) {
handler.next(context);
return;
}
handler.reject(DioException(requestOptions: context.requestOptions));
},
onError: (context, handler) {
handler.reject(context);
},
),
);
}
Future<Response<dynamic>> get(String url, {Map<String, dynamic>? params}) {
return _dio.get(url, queryParameters: params);
}
}

评论区